Well, it's about time to take a turn towards savory baking. I had been dying to try out a focaccia recipe and my mom needed bread to go with dinner (penne with clam sauce!), and would you believe it's so much easier than I thought! Some students in my Foods Lab last semester made some using a basic recipe, which I tweaked quite a bit for this post.
So basic ingredients are: active dry yeast, flour (all purpose is fine but I happened to have bread flour handy), sugar, water, olive oil, and salt. Other than that, you can pretty much customize your toppings. I went with a basil, oregano and sea salt combo.
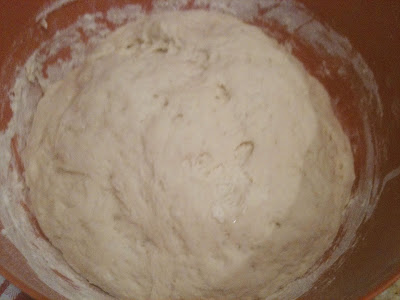
Here's how the dough looks once it doubles after 30 minutes of rising in a warm, dark place (aka my pantry). It's so awesome to see it expand like that in such a short time; although now my pantry does smell a whole lot like bread. Not that I mind. :)
I'll add the whole recipe at the end of the post, but I decided not to go completely step by step with photos since this recipe is really quite simple. I am not a bread baker, and this was my first time using yeast. But the good news is that this is a pretty forgiving recipe since formation of gluten is actually a good thing (not like in cakes). So knead away my friends!
Now the original recipe wanted me to mix the toppings with the olive oil, but I was worried that would clump and I wanted to make sure there was an even distribution of spices. So instead I brushed the entire top of the dough with olive oil and then sprinkled the seasonings over. At this point, it's time to pop it in the oven! Did I mention this recipe will fill your entire kitchen with the amazing smell of Italian spices and bread? Because it does, and it's downright awesome.
And there you have it! Fantastic Focaccia from your own oven. I have to say, now that I know I can do this, I plan on making this a lot more often, with dozens of different toppings (sundried tomatoes and mozzarella anyone?)
Focaccia
for the dough:
1 1/2 cups all purpose flour
1/4 tsp salt
1/2 tsp olive oil
1 tbsp active dry yeast
1 tsp sugar
for the topping:
olive oil (enough to coat the top of the dough)
oregano and basil (roughly 1-2 tbsp)
(feel free to add as much or as little toppings as is preferable to you; I just sprinkled both spices over the dough until I felt it was enough)
1. Mix 3/4 cup of flour with salt and olive oil
2. In a separate bowl, add 1 tbsp + 2 tsp of warm water to yeast and sugar. Mix thoroughly and let stand for roughly 10 minutes, or until frothy/foamy
3. In a large bowl, mix together flour mixture and yeast mixture with 1/2 cup of warm water
4. Knead the dough and add the remaining flour as needed to lessen the stickiness of the dough. If it becomes too dry, just add a little more warm water
5. Cover the bowl with a cloth and set in a warm, dark place to rise for 30 minutes
6. Preheat oven to 400 degrees F
7. Remove cloth and knead dough. Divide into two portions and roll (or stretch) out to 1/4 inch thickness, making either a round or oval shape. Place each on a cookie sheet and let rise in a dark place for an additional 10 minutes
8. Slash or poke the dough with your fingers (make sure to make indents over the entire dough)
9. Brush dough with olive oil and sprinkle toppings
10. Bake at 400 degrees for roughly 13-15 minutes, then turn the broiler on high and let cook for an addtional 1-2 minutes (watch carefully so it does not burn).
11. Let cool, cut into strips and serve!


Wow,I've never made this. Glad to know it's a doable recipe. Thanks for sharing. Going to buzz this one. It's gorgeous!
ReplyDeleteThanks so much!
ReplyDeleteAs usual, this looks amazing.
ReplyDeleteThanks Wes! and thanks for the follow :D
ReplyDeleteGreetings. This is my first time on your blog, but you have a terrific one. I am always on the look out for bread recipes, and yours makes me want to grab the dipping oils!
ReplyDeleteI am asking, would you please consider posting a few of your favorite recipes on erecipecards.com
http://erecipecards.com/
It is a tool for bloggers to see and to be seen. Your posts would fit in perfectly.
in addition, all photos, recipe titles as well as your blog name would link directly back to your blog. Thus giving you new attention and potentially new readers.
Or, if you just want to take a look at a lot of fellow food bloggers all in one place. A great learning experience to get ideas about how to establish your own blogging voice!
Please take a look. If you have any ideas or questions, please do not hesitate to write
Dave
http://erecipecards.com/
Contact@eRecipeCards.com