Showing posts with label snack. Show all posts

Thursday, October 18, 2012

Apple Cider Muffins

Hello friends!

So in my blogging class we were given an assignment to utilize a random image from a creative commons generator in our post. I must admit I was a little freaked out by this. If any of you have ever been on Flickr's Creative Commons, the first few photos are generally random people in random places that have nothing to do with anything I talk about here on the blog.

photo by USDAgov

How relieved was I that I stumbled onto this photo, totally within the "do not refresh the page over five times" requirement of the assignment?

Ah, crisis averted.

Because I have a wonderfully simple Autumn recipe for you today! So you can munch on these delicious apple cider muffins while sitting on a blanket under trees like these, breathing in the fresh fall air and savoring every bite of chewy muffin goodness.


Simple recipes are where it's at this season. Of course, I love spending tons of time in my kitchen for obvious reasons, but I could always use more "jumping in leaf piles" time so to speak. Don't appreciate the beautiful weather from a window! Go out and experience it!

Have a Happy Autumn Picnic even!


And volunteer to bring dessert: in the form of these muffins. You'll thank me later; I promise.

Happy Baking everyone!


Apple Cider Muffins Via ItBakesMeHappy

2 cups flour
4 packets Apple Spice Cider Mix
1/2 cup white sugar
1/2 cup brown sugar
2 tsp baking powder
1/2 tsp cinnamon
2 eggs
1/2 cup applesauce
1/2 cup milk
1/4 cup water

1. Preheat oven to 375 and grease/line muffin pan(s).
2. Whisk together flour, cider mix, both sugars, baking powder and cinnamon in a large bowl.
3. In a separate bowl, whisk together eggs, applesauce, milk and water.
4. Pour wet ingredients over dry ingredients and stir with big wooden spoon until just moistened. Do not overmix.
5. Pour 1/4 cup batter into each cavity of muffin pan.
6. Bake at 375 for 12-16 minutes or until toothpick comes out clean. Let cool on wire rack.

Apple Cider Glaze:

1/2 cup powdered sugar
1 1/2 tbsp apple cider, room temp

1. Whisk sugar and cider together until glaze forms. If too thick, add a little more cider. If too runny, add a little more powdered sugar. Drizzle over muffins.

Thursday, September 20, 2012

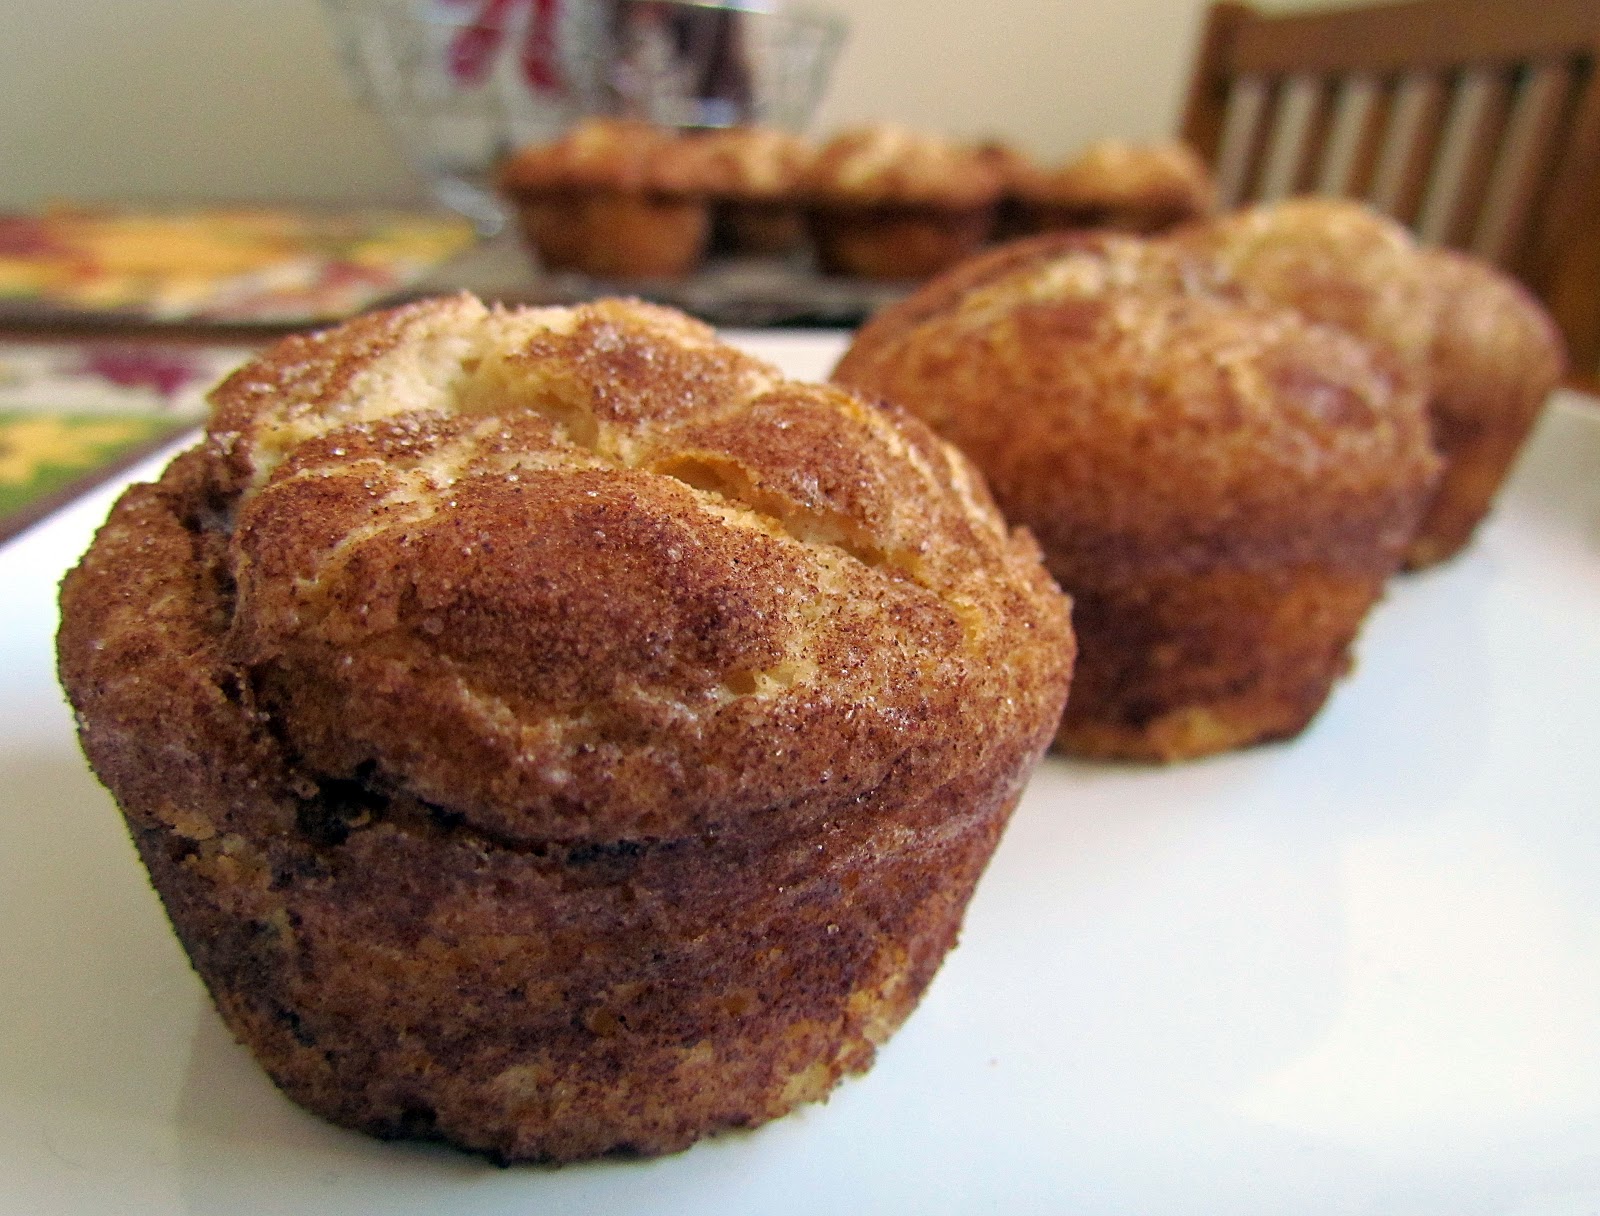
Snickerdoodle Muffins

Hello all,

I think we've established here on Sugar Mountain that I have a bit of a muffin obsession. I'm sure you are thinking "Totally understandable - muffins are freaking amazing" but in case you are one of the few who still doubts the delectable delight that is the muffin, I bring you these Snickerdoodle Muffins as proof.


Of course, you could also check out Strawberries & Cream Muffins, Lemon Streusel Coffee Cake Muffins, Red Velvet Muffins, or any other muffin lovin' recipe on my Recipe Index Page.

We will make a believer out of you.

Besides their deliciousness, I also love muffins because they are simple. If I have a bake-o-phobic friend who wants to learn how to whip up something sweet, I always point to a muffin recipe. They are so forgiving and so much fun; once you start you will quickly end up with millions of muffins in your kitchen.

Though, to be fair, these muffins were a tad more like cupcakes in preparation. Creaming butter and sugar are usually not on my "To-Do" when I'm making muffins, but the photos on EatmeDelicious were absolutely mouthwatering and I could not resist trying them. I also love any excuse to break out my Vietnamese Cinnamon. :D But even if you are a new baker or inexperienced, do not shy away from these!

Different does not always mean difficult.


Say hello to the thickest muffin batter known to man. You will need (or have after this!) some serious arm muscles to work that thing into shape.


Using an ice cream scoop, you measure out the batter and drop it into a cinnamon sugar mixture, and it holds its shape. Weird.

Roll it around real quick and plop it into a heavily greased muffin pan. They may look a little humble now, but oh, just wait. The smell alone that fills your house (or my tiny college apartment) is enough to get anyone craving a snickerdoodle. Be prepared for the masses to come running.


Not only were these fun to make (and eat of course!) they also ensured my hopes that Fall is on it's way. The crisp, cool air in the morning, the slow incorporation of cardigans and sweaters into people's wardrobes,   Pumpkin Spice Lattes at Starbucks, and now Snickerdoodle Muffins.

My life is complete, for now anyway.

Check back next Tuesday for more Fall-weather Favorites and Chai Spiced Sugar Cookies!

Happy Baking!


Snickerdoodle Muffins Via EatMeDelicious

2 sticks unsalted butter, softenend
1 cup sugar
2 tsp vanilla
2 eggs
3/4 tsp baking soda
3/4 tsp baking powder
3/4 tsp cream of tartar
3/4 tsp nutmeg
1 1/4 cup sour cream
2 1/4 cup flour

1 tbsp cinnamon + 1/2 cup sugar

1. Preheat oven to 350 degrees and heavily grease muffin pans with cooking spray or butter. In a small bowl,  combine 1/2 cup sugar and 1 tbsp cinnamon. Set aside.
2. In a medium bowl, whisk together flour, baking soda, baking powder, cream of tartar, and nutmeg.
3. In a large bowl cream butter and sugar until light and fluffy, 2-3 minutes. Beat in vanilla, then eggs, one at a time, until well incorporated.
4. Add flour mixture and sour cream to egg mixture in an alternating fashion, starting and ending with the flour. Stir until just combined, being careful not to overmix.
5. Using an ice cream scoop, measure out muffins one at a time, and drop the batter into the cinnamon/sugar mixture. Roll around in mixture, being sure to cover completely, then place muffin in greased muffin pan. Repeat until you run out of muffin batter.
6. Bake at 350 for 20-22 minutes or until a toothpick inserted in the center comes out clean.
7. Let cool in pan 10-15 minutes before removing to wire rack to cool completely.

makes approximately 12-16 muffins

Thursday, June 28, 2012

Cappuccino Biscotti

Hello friends!

Twas' a dark and stormy past few days here in Tampa. Tropical Storm Debbie was making a mess of things, and what else is a girl to do with pouring rain and high velocity winds than curl up with a good book, cup of coffee, and a nice, crisp, crunchy Biscotti.


For any of you that have noticed that I avoid said twice-baked cookie, it's because I have had less than stellar encounters with it. A cookie dough so sticky will not leave your hands combined with my colossal fear of burning cookies, the idea of baking until it is dry just somehow leaves me unimpressed.

But the house was dark, the storm clouds a permanenent fixture over my home, and I suddenly felt the need for a cookie I could dip in my coffee while reading a Victorian murder-mystery novel. Yes. I am that nerdy. British Fiction has some amazing murder-mystery novels that are perfect for being stuck inside all day. In case you're curious I recommend Lady Audley's Secret and The Woman in White. You will not be able to put them down; I promise.

Now back to cookies. Start with your dry ingredients:


and cut in the cold butter. Mix until the dough resembles coarse crumbs. Now you can do this with a pastry cutter, or two knives, but I personally prefer using a pair of clean washed fingers. Just move quickly so that the heat from your hands doesn't cause the butter to melt.
Next, add the eggs and chocolate chips and mix until the dough is just moistened. It will look a little dry still, but that's okay. Trust me in a moment it will be a sticky mess all over the counter and you will wish it was even close to that crumbly mixture you had a moment ago.

Turn it out onto a lightly floured surface and (with floured hands) knead 8 or 9 times until the dough is uniform. Shape into 2 logs and transfer to a parchment lined, or heavily greased baking pan. If you do not have parchment paper, I suggest putting another baking sheet under the one that is holding the dough, so as to ensure that the bottom doesn't bake too quickly.

Bake for 30 minutes or until the dough seems dry and solid to the touch. Do not turn off the oven; but let the dough cool for 10 minutes or until you can handle it easily without burning yourself. Slice the dough, on the diagonal, and place the cookies, cut side up, back on the cookie sheet. Bake for 7-8 minutes on one side, then flip and bake for an additional 8 minutes.


And we have Biscotti! The result was a little murky there for awhile (much like our weather of late) but I now have some delicious, crispy cookies, full of chocolate chips and a slight hint of coffee to enjoy with my books and a big comfy chair that I do not plan on leaving until I find out who killed whom in my novel.

Happy Baking!

Cappuccino Biscotti Slightly Adapted Via Crumb

2 cups flour
1/2 cup sugar
1/2 cup brown sugar
1 tsp baking powder
1 tsp instant coffee
1/2 tsp cinnamon
1/2 tsp salt
1/4 cup (1/2 stick) cold butter, sliced
1 1/2 cups chocolate chips
3 eggs, lightly beaten

egg wash (1 egg + 2 tbsp milk, lightly beaten together)

1. Preheat oven to 350 degrees and line 2 baking sheets with parchment paper.
2. In a large bowl combine first 7 ingredients. Add in slices of butter and using a pastry cutter or 2 knives, cut in until mixutre resembles coarse crumbs.
3. Add in eggs and chocolate chips and mix until just moistened. Mixture will still look crumbly; that is okay.
4. Turn dough out onto lightly floured surface and knead 8 or 9 times until dough is uniform in texture. It will be very sticky; that is okay. Split dough in half and form into 2 9-inch logs
5. Transfer dough to prepared baking sheets, brush with egg wash, and bake at 350 for 30 minutes or until dough feels firm and dry.
6. Do not turn off oven; let logs cool for 10 minutes or until easy to handle.
7. Slice logs, on the diagonal, into cookies and place back on baking sheets. Bake for 8 minutes on one side, flip, then bake again for an additional 8 minutes or until dry in center. Let cool then store in airtight container.

Friday, June 15, 2012

Strawberry Blondies

Friends,
I write to you in a slightly disappointed frame of mind today. Sadly, this is one of the posts where things did not going according to plan, and I feel like renaming the blog "On Soggy Mountain" or "On Mushy Mountain" as I bow my head in shame.


Sigh. I was so in love with the Twix Brownies earlier this week, I thought I'd attempt a blondie as a nice point of comparison between bar cookies. I also just wanted to eat an entire batch of these Strawberry Blondies from Love&Olive Oil (which I will now not be able to do. Grr.). It started out great; white chocolate, butter, eggs, strawberries, flour, pretty simple, or so I thought. Into the oven it went. Golden brown on the exterior, the knife came out clean, and out of the oven they came....

only to my sad realization that the underneath the enticing exterior lay a mushy, soggy, disappointing interior. Maybe it's a sign that I should ease up on the sweets (hah, right) but soggy or not, I could always use the extra photography practice.

I managed to grab a few decent shots, and I love this one with the new baby cupcake stand. Can you believe it was only $3? Now that's my kind of pricing for food props. It's still taking me awhile to learn all my angles, and I've started this new pinboard on Pinterest with food photography I aspire to/take inspiration from when I am attempting to photgraphy my not so splendid brownies.


I'll include the recipe here with the suggestion that lowering the oven temp to 325 (as opposed to 350) and increasing the cooking time may help you avoid a mushy mess of blondies. I'm off to find a recipe that will soothe (and feed) my fractured ego.

But as always, Happy Baking!


Strawberry Blondies Slightly Adapted Via Love&OliveOil

5 oz white chocolate, chopped
1/3 butter, cut into chunks
2/3 cup sugar
2 eggs
1/4 tsp baking powder
1/4 tsp salt
1 tsp vanilla
1 cup flour
1 cup strawberries, sliced

1. Preheat oven to 325 and line one 8x8 pan with aluminum foil and spray foil with cooking spray.
2. In microwave safe bowl, heat butter and white chocolate in 15 second increments, stirring chocolate and butter in between microwaving until melted. Stir in sugar.
3. Whisk in eggs and vanilla. Stir in flour, salt, and baking powder until just combined, then fold in strawberries.
4. Pour into prepared pan and bake at 325 for 40-45 minutes, or until set and toothpick comes clean out of the center.
5. Let cool completely before slicing into bars to serve.

Friday, March 23, 2012

Banana Bread Snickerdoodles

Friends,

I have found it.

The cookie to end all other cookies.


Don't laugh; I am dead serious here. It is called the Banana Bread Snickerdoodle and it has now become my most absolute favorite cookie in the entire world.

I am actually going to take a moment here to personally thank the creator of these cookies, Mrs. M.O.B. over at Mind Over Batter.

Dear Mrs. M.O.B.,

Your cookies are so amazing that I think you could end all the arguments currently happening on Earth by making just one cookie for every person on the planet.

Please let me know if you need help in doing so.

Best,
Jessica 

 
Now that that's out of my system - you NEED to make these cookies! She has you microwave the bananas and then take the juice from them and turn it into a syrup that goes BACK into the cookie dough. I know. It's that intense.

My whole kitchen smelled like a banana bread bakery during all of this. It was the best smell. ever.

A little bit more work than your average snickerdoodle I'll give you that. But it doesn't matter. If you consider yourself a lover of banana bread or snickerdoodles, you must must must make these cookies.


The recipe makes over 3 dozen, which sounds like a lot. However, see how much it makes when you are face-to-face with the delectable and dangerously delicious dough. Go ahead, I dare you; try not to eat an unhealthy-sized spoonful of it.

Enough said. Get going on making these cookies and start achieving world peace with their awesomeness.


Banana Bread Snickerdoodles By Mind Over Batter
makes roughly 4 dozen cookies

3 3/4 cups flour
1 1/2 tsp baking powder
pinch of nutmeg
1/4 tsp ginger
1/4 tsp cloves
1 1/4 tsp cinnamon
3 medium very ripe bananas, peeled and chopped
2 sticks butter
3/4 cup sugar
1/2 cup light brown sugar, firmly packed
 1 egg
2 tsp vanilla
2 tbsp banana syrup (recipe follows)

For banana syrup:

1. Place chopped bananas into large microwave safe bowl and microwave for about 2-3 minutes, or until the bananas start to let out juice.
2. Mash bananas through a fine mesh strainer, put banana mash aside.
3. Take banana juice and place in small saucepan and heat over medium heat. Heat until syrupy, about 2 minutes (it should reduce to about 2 tbsp). Allow to cool before using.

For cinnamon sugar:

1/2 cup brown sugar
1/4 tsp cinnamon

1. Mix together with hands until well incorporated.

For cookies:

1. Sift together flour, baking powder, nutmeg, ginger, cloves and cinnamon into a large bowl.
2. In a separate bowl cream butter until fluffy, about 1 minute. beat in both sugars and the mashed bananas until fully incorporated.
3. Mix in egg, vanilla extract, and banana syrup until well combined. Stir flour mixture into wet ingredient mixture roughly one cup at a time. Be sure to chill dough at least one hour before baking.
4. Preheat oven to 350 degrees and line cookie sheets with parchment paper (or grease liberally with cooking spray).
5. Use a cookie scoop or small spoon to scoop out tablespoonfuls of dough. Roll into balls and roll in cinnamon sugar mixture. Place at least 2 inches apart on cookie sheet. Flatten each cookie ball slightly with the bottom of a glass.
6. Bake at 350 degrees for 10-13 minutes or until cookies are slightly firm. Let cool five minutes on pan before transferring to wire cooling rack.

Tuesday, March 20, 2012

Pop Tart Pops

Hello all,

Can you believe I'm back at college already? Where on earth did my Spring Break go?! Sigh, well, back to real life I suppose. As real as college life is anyway.

Did I ever tell you what a smash hit the homemade pop tarts were? My boss was so happy with them that he heated his up in the microwave and actually ended up burning his mouth on it in excitement. So I wasn't surprised when another supervisor mentioned to me that our boss was really in the mood for pop tarts again. 'But I already did a post on pop tarts' I thought to myself.


'But this was important' she explained 'He won't accept the cinnamon challenge unless you give him more pop tarts.'

Cinnamon challenge you may ask? It's when you ingest an entire teaspoon of cinnamon by itself and try to swallow. Yes, I know, college students have weird ideas concerning entertainment. This is one of them.

But how could I say no to seeing that happen? So I thought to myself 'how do I switch up pop tarts to make it delicious for my coworkers and still new and exciting for my readers?'

Answer: Pop Tart POPS!


Like cake pops, only more pie-ish. I decided to stick with the classic strawberry which is always a favorite, along with a few Nutella-filled Pops for those daring eaters.

I used the basic pop tart pie crust from my previous post here with the only switch of using Nutella as a filling for some along with a chocolate frosting. Can I tell you though, between us, buy the premade pie crust. Seriously, just do it. Homemade is neat and all, but it gets finicky really quickly. and the pre-made is already rolled out to the right thickness and will save you a good deal of time.


Needless to say they are sure to be a huge hit at my job (where I believe I may slowly be giving everyone diabetes with all these treats). If you enjoy your co-workers' company as much as I do, maybe whip a few up for them, or if not, for some hungry housemates!

Oh, and as for the cinnamon challenge? I will try my best to get a video of every exciting second of it for you all to see. I know I can't wait. :)

Happy Baking!


Pop Tart Pops

1 homemade or store bought pie crust (recipe link here)
1 jar strawberry preserves or 1 jar Nutella
Popsicle sticks
Chocolate or Vanilla Glaze

1. Roll out Pie Crust to 1/4 inch thickness and cut into equally sized small rectangles. Place rectangles on parchment-lined cookie sheet and place one Popsicle stick in the center of each.

2. Scoop one teaspoon of filling over Popsicle stick and center of pie crust rectangle. Cover with another pie crust rectangle and use a fork to crimp the edges all the way around.

3. Bake at 350 for 7-8 minutes or until golden.

4. Coat with frosting and sprinkles and enjoy!

Monday, February 27, 2012

Quick Clementine Muffins

Hello all!

I know you are all so surprised to hear from me! But this is a quick post to share with you one of my favorite treats ever...

the muffin.


Because, no matter how many exams or papers I may have, I always have time for muffins. Like Jim Gaffigan said, "they're like muffin vitamins" and are important to maintaining my, erm, sanity to say the least.

So, clementine muffins. Simple, quick, delicious, and wonderfully reminiscent of the warmer weather I and my Northeast friends have been teased with these past few weeks. Will the warm weather stay? Probably not. Will these muffins stick around for long?


Friday, February 17, 2012

Samoa Whoopie Pies

Hello all,

Today I bring you another whoopie pie, but I must tell you, these are not like any other whoopie pie you may have tried before...


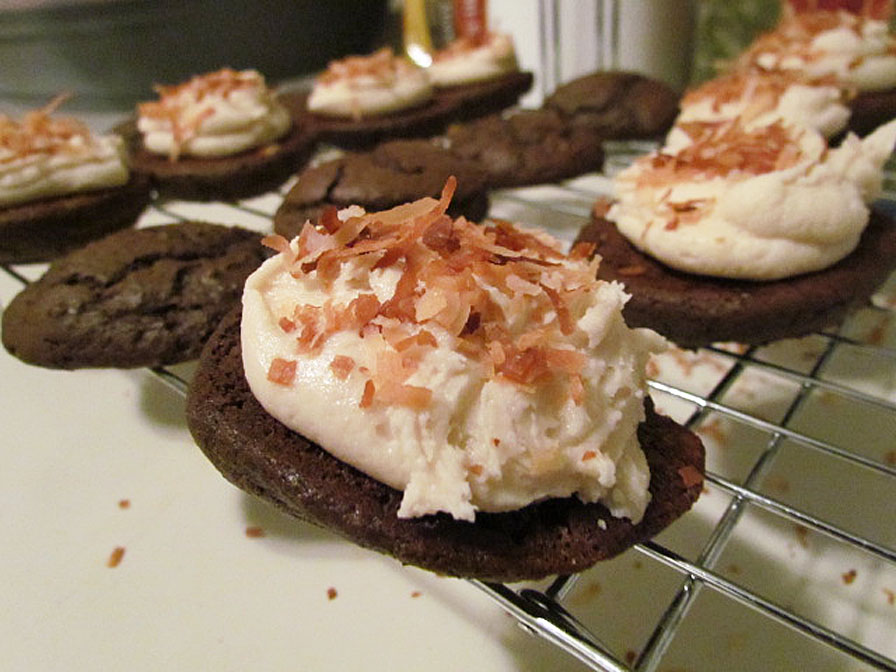
This is your favorite Girl Scout Cookie reborn into a decadent, moist, delicious dessert that is still easily portable and extremely addictive.

That's right: Samoas. My absolute favorite cookie ever.  The only issue I have with them (which I think you will all agree is a legitimate one) is that they don't put anywhere near enough cookies in one of those boxes. Let's be serious here Girl Scouts: I want to eat more than the meagre sixteen you put so delicately into one box. Okay, I know sixteen doesn't sound meagre, but leave that box in a kitchen with family members or roommates and you will realize that it is indeed never enough.

Now I know it's because they're delicate little cookies, and that it's really just the way the Girl Scouts get us to buy oh, say, a dozen boxes of each type of cookie, but I can't take it anymore. I need instant Samoa gratification and I need it now.

So, I found this stellar recipe on SweetLittleDetails and had to test it out for myself. How hard could it be?


Well, they're not so much difficult as they are a laborious. It's a many stepped process, but every step is needed to achieve chocolatey, caramel, coconut perfection.

Sigh. My life is complete.


Still want more? Check back next week for my final post on these sweet little sandwiches with Carrot Cake Whoopie Pies!

Samoa Whoopie Pies Via SweetLittleDetails


1 2/3 cups flour 
2/3 cup cocoa powder 
1 1/2 tsp baking soda
1/2 tsp salt
1/4 cup softened butter
1/4 cup shortening
1 cup brown sugar, firmly packed
1 egg
1 tsp vanilla
1 cup milk
1 cup toasted coconut
1 cup chocolate chips, melted
1. Preheat oven to 350 degrees and line two cookie sheets with parchment paper.
2. Whisk together flour, baking soda, cocoa powder, and salt in a medium bowl. In a separate, larger bowl beat butter, shortening and sugar for a good 5 minutes or until well incorporated. Beat in egg and vanilla.
3. Beat in flour mixture and milk in two additions (1/2 flour + 1/2 cup milk, repeat) until well incorporated.
4. Measure out tablespoonfuls of batter onto cookie sheet, leaving plenty of space between for spreading. Bake at 350 degrees for about 10 minutes or until whoopie pies spring back lightly when touched. Let cool 5 minutes on pan before moving to cool entirely on wire rack.
Toasting Coconut: Spread coconut out onto rimmed baking sheet and bake at 350 degrees for about 10 minutes, stirring often to prevent burning.
Chocolate Drizzle: Melt chocolate chips in microwave safe bowl on 30 second intervals until completely melted.
Caramel Buttercream
1/2 cup butter, softened
1/4 tsp salt
1/4 cup + 2 tbsp brown sugar
1 tsp vanilla extract
1/4 cup caramel syrup
1 tbsp + 2 tsp milk
3 cups powdered sugar
1. Beat butter and brown sugar, then beat in salt, vanilla, caramel syrup, and milk.
2. Slowly beat in powdered sugar.
Assembling Whoopie Pies:
Match up cookies according to size and pipe buttercream onto one cookie. Sprinkle toasted coconut on top of buttercream and then drizzle with chocolate. Place other cookie on top, pressing gently to secure. 

Tuesday, February 7, 2012

Lemon Streusel Coffee Cake Muffins

Hello all!

So I learned something while preparing for this post:

working with lemons in baking is tricky.


Case and point: this recipe I am sharing with you is the third attempt at lemon muffins in the past three days. Dedicated? Yes. Obsessed? Maybe just a little. But I just couldn't get it right until today.


For starters, however, when a recipe tells you to take 2 whole lemons, slice them in quarters, place in the blender, and then use that mixture in the muffins just stop and say no. This is a muffin PSA from me to you: don't do it. There's no way this will work out well, and do not succumb (like I did) and think that since it's a recipe on a decent-looking food blog, they will turn out great. In reality, it will be like chewing on a giant piece of lemon with bits of muffin on it.

But, after all the lemony labors of love, I have these little sweeties to show for it:


Lemony sweet and fun to eat! The coffee cake has just the slightest hint of lemon that gets amplified by the lemon glaze that catches to every inch of the crumbly struesel topping.

So, seeing as how I now have breakfast for the week, I can say it was all worth it. Not to mention during all of this the kitchen smelled lemony fresh! I hope you enjoy baking these up for yourself, knowing that it is both tested and approved by your truly.


Lemon Baking continues with the next post OnSugarMountain for Lemon Blueberry Cheesecake Cookies!

Happy Baking!

Lemon Streusel Coffee Cake Muffins Via SimplyScratch

2 cups flour
1 tsp salt
1 tsp baking powder

1 tsp baking soda   
1/2 cup butter at room temp.

1 cup sugar
1 tbsp lemon zest
2 eggs
1 tsp vanilla extract
1 cup buttermilk (or 1 tbsp white vinegar + enough milk to make 1 cup)

For the Topping:
1 3/4 cup  flour
3/4 cup brown sugar
3/4 cup butter, cubed

1 tsp salt

Lemon Glaze
1 cup powdered sugar
3 tbsp lemon juice


**Preheat oven to 350 and grease one 12-cup muffin pan OR one 6-cup jumbo muffin pan**


1. To make the topping: mix together the flour, brown sugar, and salt. Cut butter into flour mixture with pastry cutter (or two knives) until mixture resembles coarse crumbs. Keep in fridge while whipping up everything else.
2. For the muffins: Whisk together the flour, salt, baking powder, and baking soda in a medium bowl. In a large bowl, beat sugar and butter together until creamy. Add lemon zest and beat in each egg, one at a time, until fully incorporated. Mix in the vanilla.
3. Alternately fold in the flour mixture and the buttermilk, starting and ending with the flour.
4. Fill each muffin cup in pan 3/4 full. Sprinkle topping over muffin batter. 
5. Bake at 350 for 20-25 minutes for standard sized muffins or 40-45 minutes for jumbo muffins. Let cool completely before removing from pan.