Hello friends,
It has been roughly a week since Hurricane Sandy tore through the Northeast, and it took until this past Sunday for my apartment to regain power. My heart goes out to all those affected and still struggling through the aftermath. My thoughts and prayers are with you and I hope you stay safe and warm.
I have to say though, that as devastating as the storm was, it showed me how people can come together as a community to help one another in times of crisis. First, a manager at a local Stop and Shop allowed me to charge my phone so that I could call my parents and let them know I was okay. I know that doesn't sound like much, but it meant everything to me to let my family know I was safe.
Then, after attempting to hold out at my apartment for three days without power, my boyfriend and I drove back to his parents' house in North Jersey. We showed up to a house full of candles, a warm wood-burning stove, and a hot meal. Neighbors were invited over to warm up, have a bite to eat, and even get in on a surprisingly relaxing game of charades.
So thank you, to everyone who helped me and my loved ones during this past week. You all made me feel loved and it meant the world to me.
Getting the apartment back into a normal state is still taking some time though, so the most I can do is show you the super cool candy corn cookies I made before the storm and then couldn't share with you after losing power (grumble):
and then share this recipe for Oatmeal Chocolate Chip Cookie Bread, which also managed to get baked before the storm, and helped me and my boyfriend through many a cold, dreary morning with nothing else to eat.
Hopefully I will be back later this week with a fresh batch of warm, homemade goodies to share with you all.
Wishing everyone the best,
Jess
Oatmeal Chocolate Chip Cookie Bread
Via HowSweetEats
1/4 cup butter, softened
1/3 cup brown sugar
1 egg
1 tbsp vanilla
1 3/4 cup flour
1 cup old fashioned oats
1 1/2 tsp baking soda
2 tsp cinnamon
1/4 tsp salt
1 cup buttermilk
3/4 cup chocolate chunks/chips
1. Preheat oven to 375 and grease a 9 by 5 inch loaf pan with butter or cooking spray. In a medium bowl whisk together flour, oats, baking soda, cinnamon and salt.
2. Cream the butter and brown sugar until light and fluffy, then beat in the egg and vanilla.
3. Stir in half of the flour mixture, then add the buttermilk. Stir until just combined. Add in rest of flour mixture and stir until well incorporated, being sure to scrap down the sides of the bowl as needed. Fold in chocolate chips.
4. Pour into prepared pan and bake at 375 for 35-45 minutes, or until a toothpick comes out clean.
Let cool in pan for 15 minutes before removing to wire rack to cool completely.
Showing posts with label cookie. Show all posts
Tuesday, November 6, 2012
Tuesday, September 25, 2012
Chai Spiced Sugar Cookies
Friends!
I have big news!!
I met someone who knew me from my blog!!
He came to baking club last Friday and after introducing himself, said to me "Hey, you're that girl who writes On Sugar Mountain right?"
I almost died of excitement right there. I thought perhaps someone had mentioned to him that I blog, but then my VP told me he had been in the back baking cupcakes and talking about my Red Lobster Biscuits and had no idea I was the head of the club.
Life is good.
So I believe it's time to celebrate, and I see no other way than to whip up these comforting Chai Spiced Cookies and scarfing down as many of them as possible, with or without a Chai Tea Latte.
Whether you've had a bad day and need a pick me up OR have had a great day and believe you deserve something awesome (which you totally do, good day or bad day) these cookies will definitely hit the spot.
I have to admit I was a little concerned about adding black pepper to the range of spices, but the cookies come out wonderfully warm and spicy without any trace of just "pepper" flavor.
Other than pepper you've got ground ginger, allspice, and once again my vietnamese cinnamon. I can never find cardamom so I just threw in equal parts of the other spices to make up for it and no harm done.
I loved how this recipe incorporates the spices into the cookies. Instead of just rolling the cookies in a sugar spice mixture, you first mix all of the spices and all of the sugar for the recipe in one bowl, and reserve a smidge for rolling, and then beat the rest of the sugary spicy mixture with the butter. I find that it really incorporated the flavors into every bite of the cookie.
Mmmmm cookies.
These cookies are best eaten the day of when they are still pillowy soft and warm from the oven, but if you keep them in a tupperware they will stay for a few days.
You know, in case you aren't like me and can't eat dozens of cookies in one day.
I hope you are all have fantastic weeks as well! If not, spend some time in the kitchen with these Chai Cookies. You can use your hands to mix the dough, and I find kneading cookie dough to be one of the best stress relievers out there.
Right after eating said cookie dough instead of baking it.
Happy Baking!
Chai Spiced Sugar Cookies Via MyBakingAddiction
1 3/4 cups white sugar
2 1/2 tsp cinnamon
1 tsp ground ginger
1 tsp ground cardamom (or just more of the other spices if you can't find it)
1/2 tsp ground allspice
1/4 tsp ground black pepper
2 3/4 cups flour
1 tsp baking soda
1/2 tsp baking powder
1/4 tsp salt
1 cup butter, softened
1 egg
1/2 tsp vanilla
1. Preheat oven to 350 degrees and line baking sheets with parchment paper.
2. In a large bowl whisk together sugar, cinnamon, cardamom, allspice and black pepper until evenly incorporated. Reserve 1/4 cup of this mixture in a small bowl for rolling the cookies.
3. In a separate bowl, combine flour, baking soda, baking powder, and salt.
4. Cream butter and sugar-spice mixture until light and fluffy, then beat in egg and vanilla. Add flour mixture to butter mixture, mixing until well incorporated. (use clean hands if necessary!)
5. Scoop out about 2 tsp of dough, roll into ball, and roll in reserved sugar-spice mixture. Place on prepared baking sheet, leaving about 1/12 inches between cookies for spreading
6. Bake at 350 degrees for 8-10 minutes. They will look undercooked - take them out anyway and let them cool for 2 minutes on the sheet before removing to wire rack.
I have big news!!
I met someone who knew me from my blog!!
He came to baking club last Friday and after introducing himself, said to me "Hey, you're that girl who writes On Sugar Mountain right?"
I almost died of excitement right there. I thought perhaps someone had mentioned to him that I blog, but then my VP told me he had been in the back baking cupcakes and talking about my Red Lobster Biscuits and had no idea I was the head of the club.
Life is good.
So I believe it's time to celebrate, and I see no other way than to whip up these comforting Chai Spiced Cookies and scarfing down as many of them as possible, with or without a Chai Tea Latte.
Whether you've had a bad day and need a pick me up OR have had a great day and believe you deserve something awesome (which you totally do, good day or bad day) these cookies will definitely hit the spot.
I have to admit I was a little concerned about adding black pepper to the range of spices, but the cookies come out wonderfully warm and spicy without any trace of just "pepper" flavor.
Other than pepper you've got ground ginger, allspice, and once again my vietnamese cinnamon. I can never find cardamom so I just threw in equal parts of the other spices to make up for it and no harm done.
These cookies are best eaten the day of when they are still pillowy soft and warm from the oven, but if you keep them in a tupperware they will stay for a few days.
You know, in case you aren't like me and can't eat dozens of cookies in one day.
I hope you are all have fantastic weeks as well! If not, spend some time in the kitchen with these Chai Cookies. You can use your hands to mix the dough, and I find kneading cookie dough to be one of the best stress relievers out there.
Right after eating said cookie dough instead of baking it.
Happy Baking!
Chai Spiced Sugar Cookies Via MyBakingAddiction
1 3/4 cups white sugar
2 1/2 tsp cinnamon
1 tsp ground ginger
1 tsp ground cardamom (or just more of the other spices if you can't find it)
1/2 tsp ground allspice
1/4 tsp ground black pepper
2 3/4 cups flour
1 tsp baking soda
1/2 tsp baking powder
1/4 tsp salt
1 cup butter, softened
1 egg
1/2 tsp vanilla
1. Preheat oven to 350 degrees and line baking sheets with parchment paper.
2. In a large bowl whisk together sugar, cinnamon, cardamom, allspice and black pepper until evenly incorporated. Reserve 1/4 cup of this mixture in a small bowl for rolling the cookies.
3. In a separate bowl, combine flour, baking soda, baking powder, and salt.
4. Cream butter and sugar-spice mixture until light and fluffy, then beat in egg and vanilla. Add flour mixture to butter mixture, mixing until well incorporated. (use clean hands if necessary!)
5. Scoop out about 2 tsp of dough, roll into ball, and roll in reserved sugar-spice mixture. Place on prepared baking sheet, leaving about 1/12 inches between cookies for spreading
6. Bake at 350 degrees for 8-10 minutes. They will look undercooked - take them out anyway and let them cool for 2 minutes on the sheet before removing to wire rack.
Friday, July 27, 2012
Oatmeal Creme Pies
Hello friends!
Have any of you ever tried using molasses in your recipes?
Have you noticed it smells absolutely awful?
Because it does. I've always assumed it would smell warm and spicy, but as I opened this bottle my nose was assailed by a scent I can't even really describe. Let's just call it unappealing. I would've loved to switch it out for honey, which the internet told me I could, but what if this ingredient was the ingredient to push these oatmeal creme pies over the edge, into the realm of "yum" ? I found these on BakedPerfection and I thought to myself 'it has been awhile since I've whipped up anything resembling a whoopie pie, over six months in fact.' Waiting that long sounds like such a crime, don't you think?
However, between the overwhelmingly weird smell of the molasses and the fact that the dough looks like oatmeal someone left on the counter for six hours, I must admit my hopes were not high. But then the oven did its magic and in 10 short minutes I had these! Add some frosting that tastes just like a melted marshmallow, sandwich two cookies together with it, and ta-da!
Little Debbie eat you heart out.
So I guess molasses is important to the recipe. I'll just have to suck it up and bear with the strange odor it holds because these cookies are too yummy to not make again and again.
Happy Baking!
Oatmeal Creme Pies Via BakedPerfection
1 cup butter, at room temp
3/4 cup packed brown sugar
1/2 cup white sugar
2 eggs
1 tbsp molasses
1 tsp vanilla
1 3/4 cups flour
1/2 tsp salt
1 tsp baking soda
1/4 tsp cinnamon
1 1/2 cups oats
1. Preheat oven to 350 degrees and line cookie sheets with parchment paper.
2. Sift together flour, baking soda, salt and cinnamon in medium bowl and set aside.
3. In large bowl cream together butter and both sugars until well incorporated. Beat in eggs, one at a time, then finally add in the molasses and vanilla. Beat all until well incorporated.
4. Pour flour mixture into wet ingredient mixture and mix until just combined, being careful not to overmix. Stir oats in by hand with wooden spoon.
5. Drop rounded tablespoonfuls of dough ont the prepared cookie sheets, leaving plenty of space for spreading. Bake at 350 for 10-12 minutes or until edges just begin to brown.
6. Let cool on pan for 5 minutes before removing to wire rack to cool completely.
Marshmallow Filling
1/2 cup shortening
1 7oz jar Marshmallow Fluff
1/3 cup powdered sugar
1 tsp vanilla
2 tsp hot water
1/8 tsp salt
1. Dissolve salt in hot water and let cool.
2. Beat together shortening, fluff, sugar and vanilla until fluffy, 3-4 minutes. Add water and mix until well combined.
3. Spread filling on one side of a cookie, then place another cookie on top, pushing down slightly to sandwich them together.
Have any of you ever tried using molasses in your recipes?
Have you noticed it smells absolutely awful?
Because it does. I've always assumed it would smell warm and spicy, but as I opened this bottle my nose was assailed by a scent I can't even really describe. Let's just call it unappealing. I would've loved to switch it out for honey, which the internet told me I could, but what if this ingredient was the ingredient to push these oatmeal creme pies over the edge, into the realm of "yum" ? I found these on BakedPerfection and I thought to myself 'it has been awhile since I've whipped up anything resembling a whoopie pie, over six months in fact.' Waiting that long sounds like such a crime, don't you think?
However, between the overwhelmingly weird smell of the molasses and the fact that the dough looks like oatmeal someone left on the counter for six hours, I must admit my hopes were not high. But then the oven did its magic and in 10 short minutes I had these! Add some frosting that tastes just like a melted marshmallow, sandwich two cookies together with it, and ta-da!
Little Debbie eat you heart out.
So I guess molasses is important to the recipe. I'll just have to suck it up and bear with the strange odor it holds because these cookies are too yummy to not make again and again.
Happy Baking!
Oatmeal Creme Pies Via BakedPerfection
1 cup butter, at room temp
3/4 cup packed brown sugar
1/2 cup white sugar
2 eggs
1 tbsp molasses
1 tsp vanilla
1 3/4 cups flour
1/2 tsp salt
1 tsp baking soda
1/4 tsp cinnamon
1 1/2 cups oats
1. Preheat oven to 350 degrees and line cookie sheets with parchment paper.
2. Sift together flour, baking soda, salt and cinnamon in medium bowl and set aside.
3. In large bowl cream together butter and both sugars until well incorporated. Beat in eggs, one at a time, then finally add in the molasses and vanilla. Beat all until well incorporated.
4. Pour flour mixture into wet ingredient mixture and mix until just combined, being careful not to overmix. Stir oats in by hand with wooden spoon.
5. Drop rounded tablespoonfuls of dough ont the prepared cookie sheets, leaving plenty of space for spreading. Bake at 350 for 10-12 minutes or until edges just begin to brown.
6. Let cool on pan for 5 minutes before removing to wire rack to cool completely.
Marshmallow Filling
1/2 cup shortening
1 7oz jar Marshmallow Fluff
1/3 cup powdered sugar
1 tsp vanilla
2 tsp hot water
1/8 tsp salt
1. Dissolve salt in hot water and let cool.
2. Beat together shortening, fluff, sugar and vanilla until fluffy, 3-4 minutes. Add water and mix until well combined.
3. Spread filling on one side of a cookie, then place another cookie on top, pushing down slightly to sandwich them together.
Tags:
baking,
chewy,
cinnamon,
cookie,
cream,
dessert,
marshmallow,
molasses,
oatmeal,
oats,
pies,
recipe,
sandwich,
sweet,
whoopie pie,
yum
Monday, July 2, 2012
Patriotic Fruit Pizzas
Hello friends,
Have I got a simple and super fun fourth of July treat to share with you all!
Who know sugar cookies could get such an upgrade?
Yes, fruit pizza - the sweetest of all pizzas, and the easiest fix for a patriotic dessert to impress all your friends. I opted to go with individual hand-sized pizzas, so that no one would feel too guilty about eating, say, six of them. Not that I did any such thing...
Start with some sugar cookie dough. You can use your favorite recipe, or go with this one I found from Julie Blanner . They are so soft and chewy that it has quickly become my go-to recipe for sugar cookies.
While the cookies are baking, whip up some delicious cream cheese frosting. Intead of adding vanilla extract, add a touch of lemon juice. It enhances, as opposed to overpowers, the fresh, sweet flavor of the berries.. Smear some cream cheese frosting on top of your completely cooled cookies, then have at it with whatever fruit your sweet tooth desires.
With the 4th of July less then twenty-four hours away, I thought it only fitting to work with blueberries and strawberries, which coincidentally happen to be my favorite fruits. You can, of course, use any other fruit you like. Raspberries, blackberries, kiwi, pineapple - that's what I love about this recipe: its versatility.
With a thick sugar cookie base, cream cheese frosting with the slightest hint of lemon, and fresh berries, these patriotic pizzas are sure to please at any party (I do love my alliterations don't I? Sorry friends, just coudn't help it).
Happy Baking (and Happy Fourth of July) !
Patriotic Fruit Pizzas Via JulieBlanner
Sugar Cookies:
2 1/4 cups flour
1 sugar
1/2 cup (1 stick) softened butter
1/2 cup sour cream
1 egg
1 1/2 tsp vanilla
1 tsp baking soda
1/4 tsp salt
1. Preheat oven to 375 degrees and line two cookie sheets with parchment paper.
2. In a large bowl beat together butter and sugar until light and fluffy. In separate bowl, sift together flour, baking soda, and salt.
3. Add egg, sour cream, and vanilla to butter mixture and beat until well incorporated. Gently fold dry ingredient mixture into wet ingredient mixture until dough comes together.
4. Scoop tablespoonfuls of dough onto prepared cookie sheets, leaving space between them for spreading. With lightly floured fingers, gently flatten cookies to 1/4 inch thickness.
5. Bake at 375 for 7-8 minutes. Do NOT overbake. Cookies will look slightly underdone. That is okay.
6. Let cool completely on cookie sheets before removing to plate/wire rack.
Cream Cheese Icing:
8 oz softened cream cheese
2 cups powdered sugar
2 tbsp lemon juice
1. Beat all ingredients until smooth
Toppings:
strawberries, sliced
blueberries
any other fruit of your choice
Assembly:
1. Top cookies with dollop of cream cheese icing. Using a butter knife or offset spatula, smooth icing so that it is flat.
2. Cover with berries/fruit of your choice. Keep refrigerated for up to 3 days.
Have I got a simple and super fun fourth of July treat to share with you all!
Who know sugar cookies could get such an upgrade?
Yes, fruit pizza - the sweetest of all pizzas, and the easiest fix for a patriotic dessert to impress all your friends. I opted to go with individual hand-sized pizzas, so that no one would feel too guilty about eating, say, six of them. Not that I did any such thing...
Start with some sugar cookie dough. You can use your favorite recipe, or go with this one I found from Julie Blanner . They are so soft and chewy that it has quickly become my go-to recipe for sugar cookies.
While the cookies are baking, whip up some delicious cream cheese frosting. Intead of adding vanilla extract, add a touch of lemon juice. It enhances, as opposed to overpowers, the fresh, sweet flavor of the berries.. Smear some cream cheese frosting on top of your completely cooled cookies, then have at it with whatever fruit your sweet tooth desires.
With the 4th of July less then twenty-four hours away, I thought it only fitting to work with blueberries and strawberries, which coincidentally happen to be my favorite fruits. You can, of course, use any other fruit you like. Raspberries, blackberries, kiwi, pineapple - that's what I love about this recipe: its versatility.
With a thick sugar cookie base, cream cheese frosting with the slightest hint of lemon, and fresh berries, these patriotic pizzas are sure to please at any party (I do love my alliterations don't I? Sorry friends, just coudn't help it).
Happy Baking (and Happy Fourth of July) !
Patriotic Fruit Pizzas Via JulieBlanner
Sugar Cookies:
2 1/4 cups flour
1 sugar
1/2 cup (1 stick) softened butter
1/2 cup sour cream
1 egg
1 1/2 tsp vanilla
1 tsp baking soda
1/4 tsp salt
1. Preheat oven to 375 degrees and line two cookie sheets with parchment paper.
2. In a large bowl beat together butter and sugar until light and fluffy. In separate bowl, sift together flour, baking soda, and salt.
3. Add egg, sour cream, and vanilla to butter mixture and beat until well incorporated. Gently fold dry ingredient mixture into wet ingredient mixture until dough comes together.
4. Scoop tablespoonfuls of dough onto prepared cookie sheets, leaving space between them for spreading. With lightly floured fingers, gently flatten cookies to 1/4 inch thickness.
5. Bake at 375 for 7-8 minutes. Do NOT overbake. Cookies will look slightly underdone. That is okay.
6. Let cool completely on cookie sheets before removing to plate/wire rack.
Cream Cheese Icing:
8 oz softened cream cheese
2 cups powdered sugar
2 tbsp lemon juice
1. Beat all ingredients until smooth
Toppings:
strawberries, sliced
blueberries
any other fruit of your choice
Assembly:
1. Top cookies with dollop of cream cheese icing. Using a butter knife or offset spatula, smooth icing so that it is flat.
2. Cover with berries/fruit of your choice. Keep refrigerated for up to 3 days.
Thursday, June 28, 2012
Cappuccino Biscotti
Hello friends!
Twas' a dark and stormy past few days here in Tampa. Tropical Storm Debbie was making a mess of things, and what else is a girl to do with pouring rain and high velocity winds than curl up with a good book, cup of coffee, and a nice, crisp, crunchy Biscotti.
For any of you that have noticed that I avoid said twice-baked cookie, it's because I have had less than stellar encounters with it. A cookie dough so sticky will not leave your hands combined with my colossal fear of burning cookies, the idea of baking until it is dry just somehow leaves me unimpressed.
But the house was dark, the storm clouds a permanenent fixture over my home, and I suddenly felt the need for a cookie I could dip in my coffee while reading a Victorian murder-mystery novel. Yes. I am that nerdy. British Fiction has some amazing murder-mystery novels that are perfect for being stuck inside all day. In case you're curious I recommend Lady Audley's Secret and The Woman in White. You will not be able to put them down; I promise.
Now back to cookies. Start with your dry ingredients:
and cut in the cold butter. Mix until the dough resembles coarse crumbs. Now you can do this with a pastry cutter, or two knives, but I personally prefer using a pair of clean washed fingers. Just move quickly so that the heat from your hands doesn't cause the butter to melt.
Next, add the eggs and chocolate chips and mix until the dough is just moistened. It will look a little dry still, but that's okay. Trust me in a moment it will be a sticky mess all over the counter and you will wish it was even close to that crumbly mixture you had a moment ago.
Turn it out onto a lightly floured surface and (with floured hands) knead 8 or 9 times until the dough is uniform. Shape into 2 logs and transfer to a parchment lined, or heavily greased baking pan. If you do not have parchment paper, I suggest putting another baking sheet under the one that is holding the dough, so as to ensure that the bottom doesn't bake too quickly.
Bake for 30 minutes or until the dough seems dry and solid to the touch. Do not turn off the oven; but let the dough cool for 10 minutes or until you can handle it easily without burning yourself. Slice the dough, on the diagonal, and place the cookies, cut side up, back on the cookie sheet. Bake for 7-8 minutes on one side, then flip and bake for an additional 8 minutes.
And we have Biscotti! The result was a little murky there for awhile (much like our weather of late) but I now have some delicious, crispy cookies, full of chocolate chips and a slight hint of coffee to enjoy with my books and a big comfy chair that I do not plan on leaving until I find out who killed whom in my novel.
Happy Baking!
Cappuccino Biscotti Slightly Adapted Via Crumb
2 cups flour
1/2 cup sugar
1/2 cup brown sugar
1 tsp baking powder
1 tsp instant coffee
1/2 tsp cinnamon
1/2 tsp salt
1/4 cup (1/2 stick) cold butter, sliced
1 1/2 cups chocolate chips
3 eggs, lightly beaten
egg wash (1 egg + 2 tbsp milk, lightly beaten together)
1. Preheat oven to 350 degrees and line 2 baking sheets with parchment paper.
2. In a large bowl combine first 7 ingredients. Add in slices of butter and using a pastry cutter or 2 knives, cut in until mixutre resembles coarse crumbs.
3. Add in eggs and chocolate chips and mix until just moistened. Mixture will still look crumbly; that is okay.
4. Turn dough out onto lightly floured surface and knead 8 or 9 times until dough is uniform in texture. It will be very sticky; that is okay. Split dough in half and form into 2 9-inch logs
5. Transfer dough to prepared baking sheets, brush with egg wash, and bake at 350 for 30 minutes or until dough feels firm and dry.
6. Do not turn off oven; let logs cool for 10 minutes or until easy to handle.
7. Slice logs, on the diagonal, into cookies and place back on baking sheets. Bake for 8 minutes on one side, flip, then bake again for an additional 8 minutes or until dry in center. Let cool then store in airtight container.
Twas' a dark and stormy past few days here in Tampa. Tropical Storm Debbie was making a mess of things, and what else is a girl to do with pouring rain and high velocity winds than curl up with a good book, cup of coffee, and a nice, crisp, crunchy Biscotti.
For any of you that have noticed that I avoid said twice-baked cookie, it's because I have had less than stellar encounters with it. A cookie dough so sticky will not leave your hands combined with my colossal fear of burning cookies, the idea of baking until it is dry just somehow leaves me unimpressed.
But the house was dark, the storm clouds a permanenent fixture over my home, and I suddenly felt the need for a cookie I could dip in my coffee while reading a Victorian murder-mystery novel. Yes. I am that nerdy. British Fiction has some amazing murder-mystery novels that are perfect for being stuck inside all day. In case you're curious I recommend Lady Audley's Secret and The Woman in White. You will not be able to put them down; I promise.
Now back to cookies. Start with your dry ingredients:
and cut in the cold butter. Mix until the dough resembles coarse crumbs. Now you can do this with a pastry cutter, or two knives, but I personally prefer using a pair of clean washed fingers. Just move quickly so that the heat from your hands doesn't cause the butter to melt.
Next, add the eggs and chocolate chips and mix until the dough is just moistened. It will look a little dry still, but that's okay. Trust me in a moment it will be a sticky mess all over the counter and you will wish it was even close to that crumbly mixture you had a moment ago.
Turn it out onto a lightly floured surface and (with floured hands) knead 8 or 9 times until the dough is uniform. Shape into 2 logs and transfer to a parchment lined, or heavily greased baking pan. If you do not have parchment paper, I suggest putting another baking sheet under the one that is holding the dough, so as to ensure that the bottom doesn't bake too quickly.
Bake for 30 minutes or until the dough seems dry and solid to the touch. Do not turn off the oven; but let the dough cool for 10 minutes or until you can handle it easily without burning yourself. Slice the dough, on the diagonal, and place the cookies, cut side up, back on the cookie sheet. Bake for 7-8 minutes on one side, then flip and bake for an additional 8 minutes.
And we have Biscotti! The result was a little murky there for awhile (much like our weather of late) but I now have some delicious, crispy cookies, full of chocolate chips and a slight hint of coffee to enjoy with my books and a big comfy chair that I do not plan on leaving until I find out who killed whom in my novel.
Happy Baking!
Cappuccino Biscotti Slightly Adapted Via Crumb
2 cups flour
1/2 cup sugar
1/2 cup brown sugar
1 tsp baking powder
1 tsp instant coffee
1/2 tsp cinnamon
1/2 tsp salt
1/4 cup (1/2 stick) cold butter, sliced
1 1/2 cups chocolate chips
3 eggs, lightly beaten
egg wash (1 egg + 2 tbsp milk, lightly beaten together)
1. Preheat oven to 350 degrees and line 2 baking sheets with parchment paper.
2. In a large bowl combine first 7 ingredients. Add in slices of butter and using a pastry cutter or 2 knives, cut in until mixutre resembles coarse crumbs.
3. Add in eggs and chocolate chips and mix until just moistened. Mixture will still look crumbly; that is okay.
4. Turn dough out onto lightly floured surface and knead 8 or 9 times until dough is uniform in texture. It will be very sticky; that is okay. Split dough in half and form into 2 9-inch logs
5. Transfer dough to prepared baking sheets, brush with egg wash, and bake at 350 for 30 minutes or until dough feels firm and dry.
6. Do not turn off oven; let logs cool for 10 minutes or until easy to handle.
7. Slice logs, on the diagonal, into cookies and place back on baking sheets. Bake for 8 minutes on one side, flip, then bake again for an additional 8 minutes or until dry in center. Let cool then store in airtight container.
Friday, May 11, 2012
Cookie Dough Topped Brownies
Hello all,
I am positively giddy with excitement as I right this post. Would you like to know why?
Drumroll...
I made it into FoodBuzz's Top9 today with my Birthday Cake Fudge!
Because of this honor, for the first time ever, I had over 1000 hits today on the blog. It has made my day and I just want to thank each and every person that voted me into the Top9.
If I could, I'd thank you all with a batch of these Cookie Dough Topped Brownies!
Alas, I could never make that many brownies in so short a time, so I will have to be satisfied with sharing the recipe with you all and letting you know that there are, in fact, my new favorite brownies. End of story.
Seriously, who ever thought of egg-less cookie dough is a genius. I now want to use it in every cake, cupcake, brownie and sweet treat that comes out of my kitchen. I even saw a recipe for cookie dough stuffed whoopie pies - which I will let you all know right now I'm so going to test out ASAP.
It is a bit on the sweet side, but I promise you one bite will not be enough. Once you start, it is a sweet slippery slope into cookie-dough-brownie bliss.
Speaking of bliss, between these brownies and making Top9 I am spent! I hope you test these brownies out for yourselves and share them (or not) with your friends. I'm off to make some delicious lemon loaves for Mother's Day this weekend, but I'll be sure to share the sweet success with you all on Monday!
Happy Baking!
Cookie Dough Topped Brownies Via RecipeGirl
for the brownies:
1 cup melted, salted butter
4 oz chopped unsweetened chocolate
2 cups packed brown sugar
4 eggs
2 tsp vanilla
1 cup flour
1/2 cup chocolate chips
for the cookie dough:
1 cup packed brown sugar
1 cup white sugar
1 cup salted butter, room temp
1/4 cup milk
1 1/2 tsp vanilla
1 3/4 cup plus 2 tbsp flour
2 cups chocolate chips (mini if you have them)
1. Preheat oven to 350 degrees and grease a 9x13 pan with cooking spray
2. Melt chocolate in a microwave-safe bowl in 30 second intervals until smooth. Let cool slightly.
3. Whisk together melted butter and brown sugar, then whisk in the eggs and vanilla. Slowly stir in flour, mixing until just combined. Fold in chocolate chips.
4. Spread brownie batter into prepared pan and bake at 350 for 22-25 minutes, or until just set in the center. Let cool completely.
5. Meanwhile, make the cookie dough. Use a hand/stand mixer to beat together butter and both sugars, then beat in milk, vanilla and flour. Stir in chocolate chips.
6. Press cookie dough over top of cooled brownies. Stick in fridge for a few hours to set up, then cut into squares and serve!
I am positively giddy with excitement as I right this post. Would you like to know why?
Drumroll...
Because of this honor, for the first time ever, I had over 1000 hits today on the blog. It has made my day and I just want to thank each and every person that voted me into the Top9.
If I could, I'd thank you all with a batch of these Cookie Dough Topped Brownies!
Seriously, who ever thought of egg-less cookie dough is a genius. I now want to use it in every cake, cupcake, brownie and sweet treat that comes out of my kitchen. I even saw a recipe for cookie dough stuffed whoopie pies - which I will let you all know right now I'm so going to test out ASAP.
It is a bit on the sweet side, but I promise you one bite will not be enough. Once you start, it is a sweet slippery slope into cookie-dough-brownie bliss.
Speaking of bliss, between these brownies and making Top9 I am spent! I hope you test these brownies out for yourselves and share them (or not) with your friends. I'm off to make some delicious lemon loaves for Mother's Day this weekend, but I'll be sure to share the sweet success with you all on Monday!
Happy Baking!
Cookie Dough Topped Brownies Via RecipeGirl
for the brownies:
1 cup melted, salted butter
4 oz chopped unsweetened chocolate
2 cups packed brown sugar
4 eggs
2 tsp vanilla
1 cup flour
1/2 cup chocolate chips
for the cookie dough:
1 cup packed brown sugar
1 cup white sugar
1 cup salted butter, room temp
1/4 cup milk
1 1/2 tsp vanilla
1 3/4 cup plus 2 tbsp flour
2 cups chocolate chips (mini if you have them)
1. Preheat oven to 350 degrees and grease a 9x13 pan with cooking spray
2. Melt chocolate in a microwave-safe bowl in 30 second intervals until smooth. Let cool slightly.
3. Whisk together melted butter and brown sugar, then whisk in the eggs and vanilla. Slowly stir in flour, mixing until just combined. Fold in chocolate chips.
4. Spread brownie batter into prepared pan and bake at 350 for 22-25 minutes, or until just set in the center. Let cool completely.
5. Meanwhile, make the cookie dough. Use a hand/stand mixer to beat together butter and both sugars, then beat in milk, vanilla and flour. Stir in chocolate chips.
6. Press cookie dough over top of cooled brownies. Stick in fridge for a few hours to set up, then cut into squares and serve!
Friday, February 17, 2012
Samoa Whoopie Pies
Hello all,
Today I bring you another whoopie pie, but I must tell you, these are not like any other whoopie pie you may have tried before...
This is your favorite Girl Scout Cookie reborn into a decadent, moist, delicious dessert that is still easily portable and extremely addictive.
That's right: Samoas. My absolute favorite cookie ever. The only issue I have with them (which I think you will all agree is a legitimate one) is that they don't put anywhere near enough cookies in one of those boxes. Let's be serious here Girl Scouts: I want to eat more than the meagre sixteen you put so delicately into one box. Okay, I know sixteen doesn't sound meagre, but leave that box in a kitchen with family members or roommates and you will realize that it is indeed never enough.
Now I know it's because they're delicate little cookies, and that it's really just the way the Girl Scouts get us to buy oh, say, a dozen boxes of each type of cookie, but I can't take it anymore. I need instant Samoa gratification and I need it now.
So, I found this stellar recipe on SweetLittleDetails and had to test it out for myself. How hard could it be?
Well, they're not so much difficult as they are a laborious. It's a many stepped process, but every step is needed to achieve chocolatey, caramel, coconut perfection.
Sigh. My life is complete.
Still want more? Check back next week for my final post on these sweet little sandwiches with Carrot Cake Whoopie Pies!
Samoa Whoopie Pies Via SweetLittleDetails
Today I bring you another whoopie pie, but I must tell you, these are not like any other whoopie pie you may have tried before...
This is your favorite Girl Scout Cookie reborn into a decadent, moist, delicious dessert that is still easily portable and extremely addictive.
That's right: Samoas. My absolute favorite cookie ever. The only issue I have with them (which I think you will all agree is a legitimate one) is that they don't put anywhere near enough cookies in one of those boxes. Let's be serious here Girl Scouts: I want to eat more than the meagre sixteen you put so delicately into one box. Okay, I know sixteen doesn't sound meagre, but leave that box in a kitchen with family members or roommates and you will realize that it is indeed never enough.
Now I know it's because they're delicate little cookies, and that it's really just the way the Girl Scouts get us to buy oh, say, a dozen boxes of each type of cookie, but I can't take it anymore. I need instant Samoa gratification and I need it now.
So, I found this stellar recipe on SweetLittleDetails and had to test it out for myself. How hard could it be?
Well, they're not so much difficult as they are a laborious. It's a many stepped process, but every step is needed to achieve chocolatey, caramel, coconut perfection.
Sigh. My life is complete.
Still want more? Check back next week for my final post on these sweet little sandwiches with Carrot Cake Whoopie Pies!
Samoa Whoopie Pies Via SweetLittleDetails
1 2/3 cups flour
2/3 cup cocoa powder
1 1/2 tsp baking soda
1/2 tsp salt
1/4 cup softened butter
1/4 cup shortening
1 cup brown sugar, firmly packed
1 egg
1 tsp vanilla
1 cup milk
1 cup toasted coconut
1 cup chocolate chips, melted
1. Preheat oven to 350 degrees and line two cookie sheets with parchment paper.
2. Whisk together flour, baking soda, cocoa powder, and salt in a medium bowl. In a separate, larger bowl beat butter, shortening and sugar for a good 5 minutes or until well incorporated. Beat in egg and vanilla.
3. Beat in flour mixture and milk in two additions (1/2 flour + 1/2 cup milk, repeat) until well incorporated.
4. Measure out tablespoonfuls of batter onto cookie sheet, leaving plenty of space between for spreading. Bake at 350 degrees for about 10 minutes or until whoopie pies spring back lightly when touched. Let cool 5 minutes on pan before moving to cool entirely on wire rack.
Toasting Coconut: Spread coconut out onto rimmed baking sheet and bake at 350 degrees for about 10 minutes, stirring often to prevent burning.
Chocolate Drizzle: Melt chocolate chips in microwave safe bowl on 30 second intervals until completely melted.
Caramel Buttercream
1/2 cup butter, softened
1/4 tsp salt
1/4 cup + 2 tbsp brown sugar
1 tsp vanilla extract
1/4 cup caramel syrup
1 tbsp + 2 tsp milk
3 cups powdered sugar
1/4 tsp salt
1/4 cup + 2 tbsp brown sugar
1 tsp vanilla extract
1/4 cup caramel syrup
1 tbsp + 2 tsp milk
3 cups powdered sugar
1. Beat butter and brown sugar, then beat in salt, vanilla, caramel syrup, and milk.
2. Slowly beat in powdered sugar.
Assembling Whoopie Pies:
Match up cookies according to size and pipe buttercream onto one cookie. Sprinkle toasted coconut on top of buttercream and then drizzle with chocolate. Place other cookie on top, pressing gently to secure.
Thursday, January 12, 2012
Strawberry Whoopie Pies
Hello all,
The return to winter weather (for me) is approaching quicker than ever, and I am so not looking forward to it. It has been an average of 70 degrees for my winter vacation, and the idea of bracing the average 35 degrees up in New Brunswick fills me with dread. With that said - the rest of my baking adventures until I leave will be delectable, fruity, and full of Spring/Summer fun.
After the huge success of the Strawberry Shortcake Muffins, I just had to see what else I could whip up with these amazingly juicy little fruit that have just come into season down here in Florida. I came across Strawberry Whoopie Pies on SweetPea's Kitchen and I knew I had to try it.
I hope these remind you of summer as much as they do for me (I bet it would work with blueberries or raspberries as well!) and as always,
Happy Baking!
Strawberry Whoopie Pies
slightly adapted via SweetPeasKitchen
3 cups flour
1 cup brown sugar
2/3 cup vegetable oil
1 cup finely chopped strawberries
2 eggs
1/2 cup sour cream
1 1/2 tsp baking powder
1 tsp baking soda
3/4 tsp salt
1. Whisk together flour, baking powder, baking soda, and salt in a medium bowl.
2. Combine oil and sugar, whisking until thoroughly incorporated. Whisk in sour cream and strawberries.
3. Whisk in eggs, one at a time, until incorporated. Fold in flour mixture in two batches; do not overmix
4. Cover and refrigerate for 1/2 hour
5. Preheat oven to 350 degrees and line two baking sheets with parchment paper.
6. Drop heaping tablespoonfuls of batter onto the baking sheets approx. 2 inch apart (to allow for spreading).
7. Bake at 350 for 10-12 minutes or until a toothpick comes out clean from one of the cookies.
8. Let cool on pan for 10 minutes then transfer to wire rack to cool completely.
Frost - Flip cookie upside down and place large dollop of Buttercream in center. Place another cookie on top and gently press to spread Buttercream to edges.
Strawberry Buttercream
1 cup softened butter
1 cup finely chopped strawberries
4 cups powdered sugar
1-2 drops red food coloring
1. Beat butter until fluffy, then add in powdered sugar. Slowly add in strawberries and food coloring and beat until frosting reaches uniform consistency.
Whoopie Pies
The return to winter weather (for me) is approaching quicker than ever, and I am so not looking forward to it. It has been an average of 70 degrees for my winter vacation, and the idea of bracing the average 35 degrees up in New Brunswick fills me with dread. With that said - the rest of my baking adventures until I leave will be delectable, fruity, and full of Spring/Summer fun.
After the huge success of the Strawberry Shortcake Muffins, I just had to see what else I could whip up with these amazingly juicy little fruit that have just come into season down here in Florida. I came across Strawberry Whoopie Pies on SweetPea's Kitchen and I knew I had to try it.
I always thought shortening was the key for Whoopie Pies, but apparently vegetable oil and some sour cream can go a long way. These are chewy, cake-y and full of fresh strawberry flavor. Although they are sort of, well, huge (she said heaping tablespoons...) it will keep me from eating all of them in one go; I hope.
I hope these remind you of summer as much as they do for me (I bet it would work with blueberries or raspberries as well!) and as always,
Happy Baking!
Strawberry Whoopie Pies
slightly adapted via SweetPeasKitchen
3 cups flour
1 cup brown sugar
2/3 cup vegetable oil
1 cup finely chopped strawberries
2 eggs
1/2 cup sour cream
1 1/2 tsp baking powder
1 tsp baking soda
3/4 tsp salt
1. Whisk together flour, baking powder, baking soda, and salt in a medium bowl.
2. Combine oil and sugar, whisking until thoroughly incorporated. Whisk in sour cream and strawberries.
3. Whisk in eggs, one at a time, until incorporated. Fold in flour mixture in two batches; do not overmix
4. Cover and refrigerate for 1/2 hour
5. Preheat oven to 350 degrees and line two baking sheets with parchment paper.
6. Drop heaping tablespoonfuls of batter onto the baking sheets approx. 2 inch apart (to allow for spreading).
7. Bake at 350 for 10-12 minutes or until a toothpick comes out clean from one of the cookies.
8. Let cool on pan for 10 minutes then transfer to wire rack to cool completely.
Frost - Flip cookie upside down and place large dollop of Buttercream in center. Place another cookie on top and gently press to spread Buttercream to edges.
Strawberry Buttercream
1 cup softened butter
1 cup finely chopped strawberries
4 cups powdered sugar
1-2 drops red food coloring
1. Beat butter until fluffy, then add in powdered sugar. Slowly add in strawberries and food coloring and beat until frosting reaches uniform consistency.
Whoopie Pies
Thursday, August 11, 2011
In Search of the Perfect Sugar Cookie
Hello again!
The weather has been so stormy lately, and being stuck inside the house means endless amounts of time to peruse Pinterest and find more recipes to bookmark. As I am scrolling through endless amounts of pins, wondering what to do with myself on such a rainy day, I see this post for "Thick, Soft Sugar Cookies". Intrigued are you? I was. So with the rain coming down in buckets, I resist the urge to just sleep/lounge all day and head to my kitchen.
Do you have one of those treats that just reminds you of the first time you baked with your mom or on your own? For me, it's sugar cookies. From those little ones with the printed image in the center that you slice and bake, to cut-out Christmas cookies, sugar cookies have always been my favorite. So I have quite the high expectations when it comes to finding recipes online. I want a cookie that is a) soft b) chewy and c) only slightly vanilla flavored. Sugar cookies shouldn't be vanilla cookies, they should be, well, sugar - flavored. You all know what I mean, right?
Right. So I find this recipe that appears to be a good match to what I'm searching for. Pretty straightforward recipe, though I was surprised to see sour cream as an ingredient. But I decided to have some fun and I split the dough in half and make some pink cookies too. Since, well, who doesn't like pink? I also wanted perfectly round cookies, and so I channeled my inner MacGyver and used the top of the PAM spray to cut out cookies. Super easy and no need to buy a cookie cutter.
Cute? Definitely. Sugar Cookie? Yes. But, my friends, it was not to be. The quest for the perfect sugar cookie continues.
Not that these were bad. No, actually my brother and his friends quite liked them. To me, though, they were a little bland and a little dry. In all fairness, Peppermint Plum did cover her cookies with a nice thick coating of frosting, and that probably did make them delicious and much richer. But for me, a really great sugar cookie doesn't need frosting. It's a cookie, not a cake. Maybe some rainbow sprinkles, I'll give you that, but like I said, I have really high expectations when it comes to these.
But hey, even though they weren't my favorite, it still gave me another chance to play around with the camera and try to improve my photography skills. It also kept me from sitting on my bum all day watching tv, so in the grand scheme, it actually was a pretty successful baking experience.
I've included the link to the recipe here, with some more photos as I continue to practice my food styling. As I continue to fight with lighting issues I don't quite know how to amend without professional lighting, and my own lack of creativity when it comes to setup, I remind myself - practice makes perfect (or better at least). One day though, I will have picturesque setups with my desserts on beautiful cake stands and adorable accessories and backdrops. One day.
Please feel free to leave suggestions in the comment box if you have any ideas for cute ways to set up my photos! :D I'm always up for hearing from fellow bloggers on ways to improve. Happy Baking!
The weather has been so stormy lately, and being stuck inside the house means endless amounts of time to peruse Pinterest and find more recipes to bookmark. As I am scrolling through endless amounts of pins, wondering what to do with myself on such a rainy day, I see this post for "Thick, Soft Sugar Cookies". Intrigued are you? I was. So with the rain coming down in buckets, I resist the urge to just sleep/lounge all day and head to my kitchen.
Cute? Definitely. Sugar Cookie? Yes. But, my friends, it was not to be. The quest for the perfect sugar cookie continues.
Not that these were bad. No, actually my brother and his friends quite liked them. To me, though, they were a little bland and a little dry. In all fairness, Peppermint Plum did cover her cookies with a nice thick coating of frosting, and that probably did make them delicious and much richer. But for me, a really great sugar cookie doesn't need frosting. It's a cookie, not a cake. Maybe some rainbow sprinkles, I'll give you that, but like I said, I have really high expectations when it comes to these.
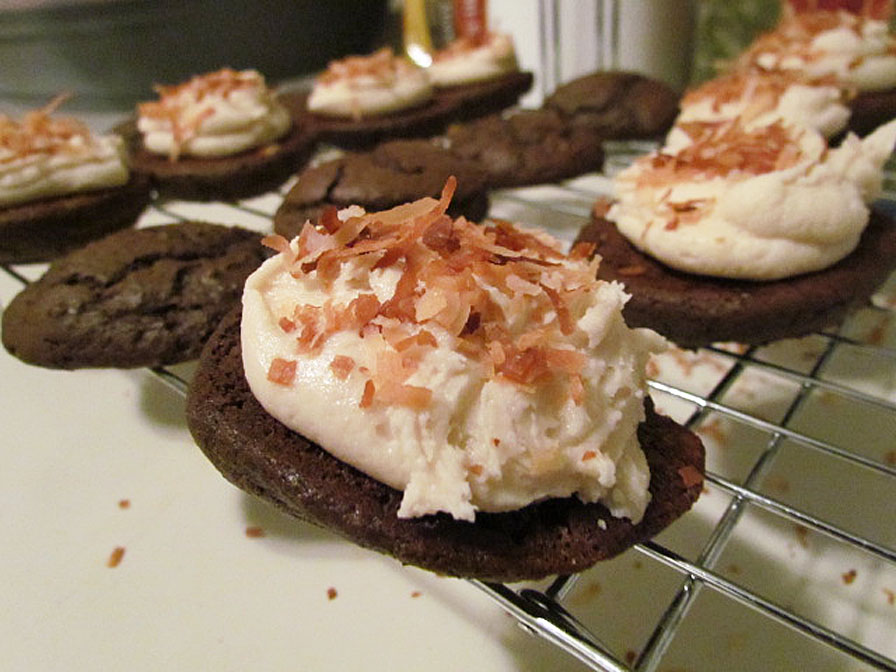
But hey, even though they weren't my favorite, it still gave me another chance to play around with the camera and try to improve my photography skills. It also kept me from sitting on my bum all day watching tv, so in the grand scheme, it actually was a pretty successful baking experience.
I've included the link to the recipe here, with some more photos as I continue to practice my food styling. As I continue to fight with lighting issues I don't quite know how to amend without professional lighting, and my own lack of creativity when it comes to setup, I remind myself - practice makes perfect (or better at least). One day though, I will have picturesque setups with my desserts on beautiful cake stands and adorable accessories and backdrops. One day.
Please feel free to leave suggestions in the comment box if you have any ideas for cute ways to set up my photos! :D I'm always up for hearing from fellow bloggers on ways to improve. Happy Baking!
Subscribe to:
Posts (Atom)