Showing posts with label bake. Show all posts

Tuesday, September 25, 2012

Chai Spiced Sugar Cookies

Friends!

I have big news!!

I met someone who knew me from my blog!!

He came to baking club last Friday and after introducing himself, said to me "Hey, you're that girl who writes On Sugar Mountain right?"

I almost died of excitement right there. I thought perhaps someone had mentioned to him that I blog, but then my VP told me he had been in the back baking cupcakes and talking about my Red Lobster Biscuits and had no idea I was the head of the club.

Life is good.


So I believe it's time to celebrate, and I see no other way than to whip up these comforting Chai Spiced Cookies and scarfing down as many of them as possible, with or without a Chai Tea Latte.

Whether you've had a bad day and need a pick me up OR have had a great day and believe you deserve something awesome (which you totally do, good day or bad day) these cookies will definitely hit the spot.


I have to admit I was a little concerned about adding black pepper to the range of spices, but the cookies come out wonderfully warm and spicy without any trace of just "pepper" flavor.

Other than pepper you've got ground ginger, allspice, and once again my vietnamese cinnamon. I can never find cardamom so I just threw in equal parts of the other spices to make up for it and no harm done.


I loved how this recipe incorporates the spices into the cookies. Instead of just rolling the cookies in a sugar spice mixture, you first mix all of the spices and all of the sugar for the recipe in one bowl, and reserve a smidge for rolling, and then beat the rest of the sugary spicy mixture with the butter. I find that it really incorporated the flavors into every bite of the cookie.


Mmmmm cookies.

These cookies are best eaten the day of when they are still pillowy soft and warm from the oven, but if you keep them in a tupperware they will stay for a few days.

You know, in case you aren't like me and can't eat dozens of cookies in one day.

I hope you are all have fantastic weeks as well! If not, spend some time in the kitchen with these Chai Cookies. You can use your hands to mix the dough, and I find kneading cookie dough to be one of the best stress relievers out there.

Right after eating said cookie dough instead of baking it.


Happy Baking!


Chai Spiced Sugar Cookies Via MyBakingAddiction

1 3/4 cups white sugar
2 1/2 tsp cinnamon
1 tsp ground ginger
1 tsp ground cardamom (or just more of the other spices if you can't find it)
1/2 tsp ground allspice
1/4 tsp ground black pepper
2 3/4 cups flour
1 tsp baking soda
1/2 tsp baking powder
1/4 tsp salt
1 cup butter, softened
1 egg
1/2 tsp vanilla

1. Preheat oven to 350 degrees and line baking sheets with parchment paper.
2. In a large bowl whisk together sugar, cinnamon, cardamom, allspice and black pepper until evenly incorporated. Reserve 1/4 cup of this mixture in a small bowl for rolling the cookies.
3. In a separate bowl, combine flour, baking soda, baking powder, and salt.
4. Cream butter and sugar-spice mixture until light and fluffy, then beat in egg and vanilla. Add flour mixture to butter mixture, mixing until well incorporated. (use clean hands if necessary!)
5. Scoop out about 2 tsp of dough, roll into ball, and roll in reserved sugar-spice mixture. Place on prepared baking sheet, leaving about 1/12 inches between cookies for spreading
6. Bake at 350 degrees for 8-10 minutes. They will look undercooked - take them out anyway and let them cool for 2 minutes on the sheet before removing to wire rack.

Thursday, September 20, 2012

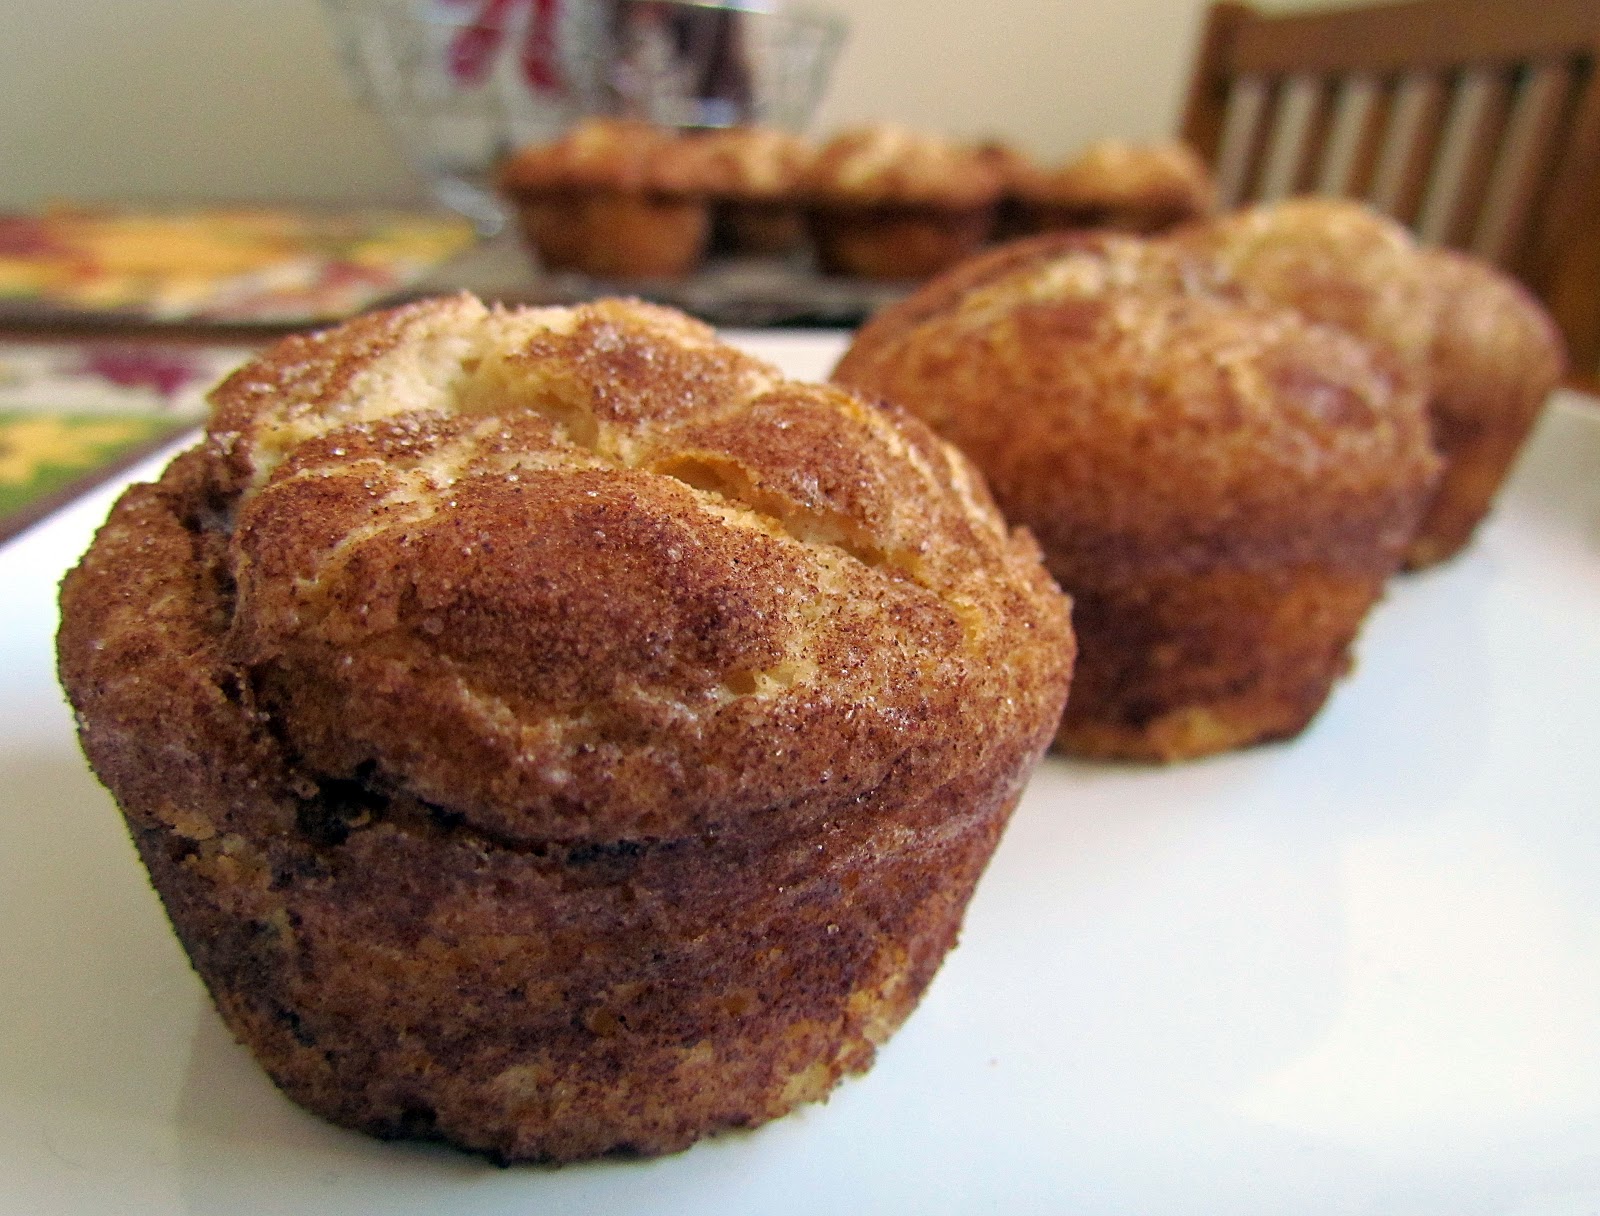
Snickerdoodle Muffins

Hello all,

I think we've established here on Sugar Mountain that I have a bit of a muffin obsession. I'm sure you are thinking "Totally understandable - muffins are freaking amazing" but in case you are one of the few who still doubts the delectable delight that is the muffin, I bring you these Snickerdoodle Muffins as proof.


Of course, you could also check out Strawberries & Cream Muffins, Lemon Streusel Coffee Cake Muffins, Red Velvet Muffins, or any other muffin lovin' recipe on my Recipe Index Page.

We will make a believer out of you.

Besides their deliciousness, I also love muffins because they are simple. If I have a bake-o-phobic friend who wants to learn how to whip up something sweet, I always point to a muffin recipe. They are so forgiving and so much fun; once you start you will quickly end up with millions of muffins in your kitchen.

Though, to be fair, these muffins were a tad more like cupcakes in preparation. Creaming butter and sugar are usually not on my "To-Do" when I'm making muffins, but the photos on EatmeDelicious were absolutely mouthwatering and I could not resist trying them. I also love any excuse to break out my Vietnamese Cinnamon. :D But even if you are a new baker or inexperienced, do not shy away from these!

Different does not always mean difficult.


Say hello to the thickest muffin batter known to man. You will need (or have after this!) some serious arm muscles to work that thing into shape.


Using an ice cream scoop, you measure out the batter and drop it into a cinnamon sugar mixture, and it holds its shape. Weird.

Roll it around real quick and plop it into a heavily greased muffin pan. They may look a little humble now, but oh, just wait. The smell alone that fills your house (or my tiny college apartment) is enough to get anyone craving a snickerdoodle. Be prepared for the masses to come running.


Not only were these fun to make (and eat of course!) they also ensured my hopes that Fall is on it's way. The crisp, cool air in the morning, the slow incorporation of cardigans and sweaters into people's wardrobes,   Pumpkin Spice Lattes at Starbucks, and now Snickerdoodle Muffins.

My life is complete, for now anyway.

Check back next Tuesday for more Fall-weather Favorites and Chai Spiced Sugar Cookies!

Happy Baking!


Snickerdoodle Muffins Via EatMeDelicious

2 sticks unsalted butter, softenend
1 cup sugar
2 tsp vanilla
2 eggs
3/4 tsp baking soda
3/4 tsp baking powder
3/4 tsp cream of tartar
3/4 tsp nutmeg
1 1/4 cup sour cream
2 1/4 cup flour

1 tbsp cinnamon + 1/2 cup sugar

1. Preheat oven to 350 degrees and heavily grease muffin pans with cooking spray or butter. In a small bowl,  combine 1/2 cup sugar and 1 tbsp cinnamon. Set aside.
2. In a medium bowl, whisk together flour, baking soda, baking powder, cream of tartar, and nutmeg.
3. In a large bowl cream butter and sugar until light and fluffy, 2-3 minutes. Beat in vanilla, then eggs, one at a time, until well incorporated.
4. Add flour mixture and sour cream to egg mixture in an alternating fashion, starting and ending with the flour. Stir until just combined, being careful not to overmix.
5. Using an ice cream scoop, measure out muffins one at a time, and drop the batter into the cinnamon/sugar mixture. Roll around in mixture, being sure to cover completely, then place muffin in greased muffin pan. Repeat until you run out of muffin batter.
6. Bake at 350 for 20-22 minutes or until a toothpick inserted in the center comes out clean.
7. Let cool in pan 10-15 minutes before removing to wire rack to cool completely.

makes approximately 12-16 muffins

Tuesday, September 11, 2012

Salted Caramel Kiss Cookies

Hello friends!

So I survived the first week of classes; I cannot tell you how glad I am that is over. Slowly but surely I am getting back into the groove here at Rutgers, and for those moments when a long hot shower won't cut it in terms of stress-relief, there are always these cookies to fall back on....


Salted. Caramel. Cookies.

Seriously.  Do not be intimidated by the whole "browning butter" deal. I waited far too long to attempt a recipe that included this step, and I now regret it. It is simple yet oh so satisfying and, of course, you can impress all your friends. ;)


See? If I can manage to brown butter without turning it into a black, burnt-out mess, so can you. The key is to stir constantly once all of the butter has melted to keep it from burning on the bottom. Oh and the smell? Slightly nutty, slightly caramel-y, all delicious.

Once it cools you mix in some brown sugar, eggs, and the typical flour and baking soda/powder elements. The dough is a tad soft so you may want to store it in the fridge for 30 minutes, unless you like your cookies thinner. If you like the look of mine, 30 minutes is perfect.


Another simple way that this recipe steps it up? By rolling the cookie dough in a brown sugar/white sugar mixture. Pure genius. The molasses flavor in the brown sugar really brings out the browned butter in the dough. Add a caramel-filled kiss in the center and a few flecks of sea salt, and you have one cookie that is sure to take away the stress of the day in every bite.


Impressively adorable, yet simple to make. Not to mention sharing them with my co-workers brightened up everyone's day.

I think this is going to be the new mantra of "On Sugar Mountain". The semester is going to be full of exciting, yet often stressful moments, and I am determined to show how just a little bit of love and effort in the kitchen can really pay off. Stress-reducing is not the only thing these cookies are great for; perhaps you're a freshman and want to make some friends? Or a transfer student? Or maybe you just want to make people smile? There is no better way to make friends than by sharing food, especially if it's food you made. The thought makes people smile, and it's a great way to get your "foot in the door" so to speak. New acquaintances will have something to remember you by, and who knows, maybe they will make something in return. I have said it before and I'll say it again: world peace can be achieved through cookies. Or cake. If we all take a moment to think of making others, as well as ourselves happy, we can do a lot of good with just a little bit of sweetness.

I shall go now, before I wax sentimental (though I think I already have!) but check back soon for more deliciously inspiring sweets to make, bake, and share with your friends!

Happy Baking!


 Salted Caramel Kiss Cookies Via Cookies&Cups

14 tbsp butter, preferably salted, cut into slices
1 3/4 cup brown sugar
2 cups + 2 tbsp flour
1/2 tsp baking soda
1/4 tsp baking powder
1 tsp salt
1 egg + 1 egg yolk
1 1/2 tbsp vanilla
1/4 cup white sugar
1/4 cup brown sugar
roughly 24 Caramel Kisses, or caramel filled chocolate candies

1. Preheat oven to 350 and line your baking sheets with parchment paper
2. Put butter in a medium saucepan over medium-high heat. Let butter melt and then stir constantly until butter turns a caramel/brown color. Let cool 15 minutes.
3. Mix together flour, baking soda, baking powder and salt in bowl. Set aside.
4. Pour cooled butter into a medium-sized mixing bowl and add 1 3/4 cup brown sugar. Mix with hand mixer until no lumps remain. Then beat in egg, yolk and vanilla.
5. Add flour mixture to butter mixture and mix until dough comes together. At this point you can let the dough chill in the fridge for 30 minutes or just continue making cookies.
6. Mix together white sugar and brown sugar in small bowl. Roll dough into heaping tablespoon-sized balls and then roll ball in sugar mixture. Place on prepared baking sheet, leaving room for spreading.
7. Bake at 350 for 12-14 minutes or until edges just begin to brown. DO NOT overbake.
8. As soon as cookies come out of oven, place a caramel kiss in the center, pushing down slightly. Dust cookies with sea salt. Then let cool on wire rack.

Tuesday, July 31, 2012

S'mores Cookies

Hello friends,

Can you believe that I am having even more ingredient mishaps? Though truth be told, the molasses ended up being an ingenious addition to the Oatmeal Creme Pies. But this is another matter entirely. Why is it that as soon as I want to make these S'mores Cookies from Kevin&Amanda that I've had pinned for weeks, all of a sudden these Mallow Bits are absolutely nowhere to be found?!


Thank goodness my Mom had bought them awhile back, but there was barely any left of the entire container by the time I got my hands on it. Naturally I needed a whole cup of these adorably tiny marshmallows, which was most certainly not how much was left. Luckily, I managed to split the recipe in half, though it sadly yielded only one dozen cookies. Seriously, when are 12 cookies enough for anyone? But I guess it's better than the horror that would be no cookies.


I've become quite good at halving recipes, usually with positive results, though I am always a bit wary of measuring out half an egg. If you are too, InKatrina'sKitchen has some lovely tips and tricks that will help you halve any of your favorite recipes that only call for one egg. The other ingredients were easy enough to cut down and included what one would expect for a S'mores Cookie: crushed graham crackers and lots of chocolate chips. Brown sugar is always a nice touch too.


So I have to come clean. I do love s'mores, but a lot of the desire for making these cookies came from the image of the cookie dough I pinned to Pinterest. Case and Point: Don't you just want to reach in and eat all of that beautiful marshmallowy mess as is? I really really wanted to, but remember I had to cut the recipe in half because of those blasted marshmallows. So no dough could be snatched by frivolous fingers and eaten happily by yours truly. Better luck next time I guess.


I'm glad I waited. My only complaint is that my cookies did not spread anywhere near as much as the original recipe appeared to, but regardless they are chewy, wholesome cookies with marshmallows and chocolate in every bite. It's like the chocolate chip cookie got jealous of s'mores and decided they should team up to make one awesome super cookie. Oh and the other complaint (I'm sorry I know I said I only had one) is that there weren't enough!! I better see those Mallow Bits back on the shelves ASAP because these cookies will not last long.

Until next time,

Happy Baking!


S'Mores Cookies Via Kevin&Amanda

1/2 cup softened butter
1/2 cup white sugar
1/4 cup brown sugar
1 egg
1 tsp vanilla
1 1/3 cups flour
3/4 cup graham cracker crumbs, finely processed
1 tsp baking powder
1/2 tsp salt
1 cup mini (or regular) chocolate chips
1 cup Mallow Bits

1. Preheat oven to 350 degrees and line cookie sheets with parchment paper. Spray parchment paper with cooking spray.
2. Cream butter and both sugar until well incorporated. Beat in egg and vanilla. Meanwhile in a separate bowl sift together the flour, graham cracker crumbs, baking powder, and salt.
3. Add dry ingredient mixture to wet ingredient mixture and stir until dough comes together. Stir in chocolate chips and mallow bits.
4. Drop rounded tablespoonfuls of dough onto prepared baking sheets, leaving space between for spreading.
5. Bake at 350 for 10-12 minutes or until edges begin to brown. Let cool on pan for 2 minutes before removing to wire rack to cool completely.

Yield: roughly 2 dozen cookies

Tuesday, July 24, 2012

THE Best Banana Bread

Hello friends,

No, you did not misread that title. This is truly the best banana bread I've ever had the pleasure of baking and eating. I do love my Oreos, but after they inspired some kick-ass cookies and cupcakes, I was suddenly craving some serious warm, cozy, wholesome flavors that can only be administered by a well-baked banana bread.


But what recipe would ensure a satisfied craving? I began roaming through recipes, searching Pinterest and FoodGawker until I almost lost hope. Why does nearly every recipe I find have to be "Banana + other flavor I don't want detracting from my Banana Bread Bread"? Banana Coconut Bread, Banana Walnut Bread, I just want Banana Bread. Much like my feeling to carrot cake, I am a bit of a purist when it comes to this. Absolutely no nuts may permeate my bread, and I must really be in the mood for chocolate chips. No, when I bite into a piece of banana bread, I want pure, unadulterated banana flavor. No extracts or extras.

But then, on what I want to say was page eleven or twelve of my search on FoodGawker, I saw it. The Cook's Illustrated Recipe for Banana Bread. The link led me to "First Look then Cook" and wouldn't you know it, the method for preparing this bread sounded eerily similar to the preparation of a certain Banana Bread Snickerdoodle I attempted awhile back. My conclusion?


Microwaving Bananas, extracting the juices, then reducing them to a decadent banana syrup is by far one of the most awesome ideas I've ever encountered online. Merely mashing bananas? Please. Let's all step it up a bit here and take the sweet, syrupy plunge. It makes a world of a difference.

A side note though. After these photos, I've come to the realization that banana bread batter, unlike chocolate chip cookie dough or a fluffy vanilla frosting, does not look appetizing. At all. I could tell you what I think it looks like but, well, I'll leave that to your wonderful imagination.


Ah, that's better.


Do I dare tell you that I ate at least half of this loaf on my own, probably to the slight frustration of the rest of my family, also avid banana bread lovers? Do I tell you it is absolutely divine with a nice cup of hot coffee first thing in the morning? But I bet you already knew all of that...So bake, eat, enjoy; revel in the delicious flavor of this banana bread and share it (or not!) with all your friends. You'll be glad you did!

Happy Baking!


Cook's Illustrated Banana Bread
Via FirstLookthenCook


1 3/4 cup flour
1 tsp baking soda
1/2 tsp salt
1/2 cup butter, melted and cooled
4-5 large, peeled, very ripe bananas
2 eggs
3/4 cup brown sugar, packed
1 tsp vanilla
2 tsp sugar

1. Preheat oven to 350 and grease one 8 1/2 by 4 1/2 inch loaf pan with cooking spay.
2. Place bananas in microwave safe bowl and heat in microwave for 2-5 minutes, until the bananas give off about 1/3 cup liquid. Transfer bananas to fine-meshed strainer over a small saucepan. Let drain for 10-15 minutes, stirring occasionally.
3. Meanwhile, sift together flour, baking soda, and salt in medium bowl and set aside.
4. Once bananas have drained, place bananas into large bowl and set the saucepan with the banana liquid over medium-high heat, allowing to reduce to about 1/4 cup (about 5 minutes).
5. Pour banana liquid over bananas and mash together until you reach a relatively uniform consistency. Whisk in eggs, butter, brown sugar, and vanilla.
6. Fold flour mixture into banana mixture, being careful not to over-mix. A few streaks of flour are okay.
7. Pour batter into prepared loaf pan, sprinkle 2 tsp of sugar over top, and bake at 350 for 55-75 minutes, or until toothpick inserted in center comes out clean.
8. Let cool in pan for 10 minutes before transferring to wire rack to cool completely.

Tuesday, July 17, 2012

Oreo Explosion Cupcakes

Hello friends,

What is it about Oreos that makes us all smile? Of course they're yummy, chocolatey (shockingly even vegan) but this little cookie manages to make my day that much better no matter how I am feeling. Example number one: The Oreo Cheesecake Cookies from last Friday. Stress + Jess = cranky mess. Stress + Jess + OREOS = no more stress. It's like magic, except if it were truly magic there would be no calories involved either. Maybe if I only eat six it won't matter...


or maybe I just won't look at the nutrional facts on the box for awhile.

Today brings about example number two in the Oreos for a Less Stressful You project. Yes, I just came up with that right now as an excuse to eat way more Oreos than is nutritionally suggested. Don't judge me; I know you're all thinking it sounds like a great idea that should be supported nationwide.


Now these aren't just any Oreo Cupcakes. These are cupcakes with:

a) half an oreo on the bottom
b) oreo chunks suspended throughout vanilla cake
c) cream cheese frosting
d) oreo crumb topping
e) all of the above


I will admit I was just a tad worried that the ratio of Oreo to Cake was too high, but then I reminded myself that there is no such thing as too many Oreos. Ever. I can feel the stress floating away already. Do you have a favorite Oreo recipe? Does it help you de-stress on those day when nothing else can? If not, find one! I promise you, nothing can ease a stressful mind like an Oreo, or more accurately a cupcake overflowing with Oreos

Happy Baking!

Oreo Explosion Cupcakes Via Annie'sEats

1/2 cup butter, softened
1 2/3 cup sugar
3 egg whites
2 tsp vanilla
2 1/4 cups flour
1 baking powder
1/2 tsp salt
1 cup milk
24 oreo halves
20 coarsely chopped oreos

1. Preheat oven to 350 degrees and line 2 cupcake pans with paper liners. Place one side of an Oreo cookie (preferably with the cream still attached) in the bottom of each liner.
2. In medium bowl sift together flour, baking powder and salt. Set aside.
3. In large bowl cream together butter and sugar until light and fluffy, then beat in egg whites, one at a time, until fully incorporated. Beat in vanilla.
4. Beat in 1/3 of the flour mixture on lowest speed until just incorporated, followed by 1/2 of the milk. Repeat, beginning and ending with the flour, beating until you reach a uniform consistency.
5. Gently fold in chopped Oreos.
6. Equally divide batter amongst cupcake lined pans and bake at 350 for 18-20 minutes, rotating the pan once during baking. Cupcakes are done when a toothpick inserted in the center comes out clean
7. Let cool in pan for 5 minutes before removing to cool completely on wire rack.

Cream Cheese Frosting

8 oz cream cheese
6 tbsp butter
1 tbsp vanilla
4 cups powdered sugar
2 tbsp heavy cream
Oreo Crumbs
1. Cream butter and cream cheese until well blended. Beat in vanilla, followed by powdered sugar.
2. Beat in heavy cream on low at first until fully incorporated then on medium/high for roughly 3-4 mintues until frosting is light and fluffy.
3. Pipe frosting onto cooled cupcakes, then sprinkle with Oreo Crumbs.

Friday, April 6, 2012

Easter Nest Cupcakes

Hello all,


Did I ever mention I love Easter? I believe much of my enormous sweet tooth is owing to the awesome Easter Baskets the "bunny" left for my brother and me each year. Unfortunately the bunny no longer stops at my place, so I've had to make due with buying extraordinary amounts of Peeps and scarfing down these carrot cake cupcakes.

Easter = Bunny = Bunnies love carrots = Jess loves carrot cake = carrot cake cupcakes for Easter.

Plus I was so inspired by ParisPastry's Easter Nest Cupcakes that I just had to try it out for myself. I picked up these at Wal Mart the other day:


and got straight to work. Not bad if I do say so myself. :D


A breath of relief as I dig into one and it's absolutely heavenly; no need to relive the disappointment of the Chai Cupcake. 


And in case carrot cake isn't your favorite, here are a few links for some adorable Easter Sweet Treats I've stumbled upon that could be show-stoppers in case you're in charge of dessert this Sunday:

1. Easter Bunny Cake Pops by Bakerella
2. Chick Cupcakes by BirdonaCake
3. PeepCakes by 52 Kitchen Adventures
4. Basket Cupcakes by Dinners, Dishes and Desserts
5. Egg Hunt Cupcakes by InKatrinasKitchen
6. Easter Nest Sugar Cookies by PenniesonaPlatter
7. Coconut Macaroon Nest Cookies by PreparedPantry
8. Easter Bunny Macarons by raspberricupcakes
9. Ultimate Easter Crispy Treats by DoughPuncher
10. Easter Bunny Push Pops by Hungry Happenings

I hope one of these links comes in handy for you in preparation of the holiday - or if you just need another excuse to bake like I do.

Pssst - I have a secret to tell you! 
The next cupcakes coming up are going to be a smash hit!

Would you like a hint? Bananas + Strawberries + Chocolate = ?

Happy Baking!


Carrot Cake Cupcakes Via Yours Truly

1 cup flour
2 cups shredded carrots
1 cup sugar
1 tsp baking soda
1 tsp cinnamon
2 eggs
3/4 cup vegetable oil

1. Preheat oven to 350 degrees and line one 12-cup muffin pan with cupcake liners.
2. In a bowl sift together flour, baking soda and cinnamon. In a separate bowl beat sugar and oil until well combined. Beat in eggs, one at a time, then beat in vanilla.
3. Stir carrots into wet ingredient mixture, then gently fold in dry ingredient mixture.
4. Fill cupcake liners 2/3 way full (I use a 1/4 cup measuring cup) and bake at 350 for 15-20 minutes or until a toothpick comes out clean
5. Frost with vanilla or cream cheese frosting and enjoy!