The BabyCakes Cake Pop Maker!!
I know what your thinking, "wait, didn't she just get the Donut Maker?" The answer is yes, but this was free! Or at least it was with the Kohls' Cash my mom and I earned the other day shopping. Free Cake Pop Maker makes me a happy baker.
I have made cake pops the old-fashioned way (and by old fashioned I mean new-fashioned, since cake pops are a relatively new phenomenon in the blogosphere) where you bake an entire cake, let it cool completely, crumble it, mix in frosting, etc etc. It's a long enough endeavor to make even the most patient cake bakers antsy with anticipation. So naturally when I saw this, I thought how much more quickly the entire process can be done, which means more cake pops for me (which is always a good thing).
As the title of the post implies, I had some concerns with these cake pops. Here's the first: I understand why the upper half of the cake pop is lighter than the lower part. It's because the cake needs to rise and the lower half has more contact and thus more time to brown.
Science, I understand - I just don't care. I want the entirety of my tiny spherical cakes to be that beautiful golden brown, not just one side.
But, as much as I dislike the color change, these are delicious. None of that mushy, under-baked texture you get when you bite into the Starbucks Cake Pop or the homemade ones with the frosting mixed in. Just pure, moist, tender-crumbed cake.
Then, I prepare for the dipping. This is always the most difficult part of the recipe, but I took my precautions. I pre-dipped the lollipop sticks in melted chocolate to bind the cake to the stick. I thought this would be fool-proof...
Alas, there are always some casualties. This poor little pop started to slide down the lollipop stick even before I finished dipping it.
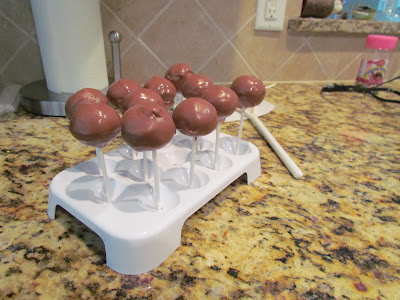
Did I mention that the cake pop maker comes with this nifty cake pop holder/stand? This beats the old styrofoam block by a long shot. I had made more than a dozen little cakes, so for the ones that did not make it to the stand, I made cake truffles instead.
So here is the conundrum my friends: these look adorable, but do not taste as good as one might think. The chocolate coating is too overpowering for the cake. Perhaps the coating is too thick, or it could be that there is less flavor without the frosting mixed in.
So to dip or not to dip - that is the question. I (and my mom) enjoy these little cakes plain, but check back here tomorrow as I will attempt these little pops again with red velvet, and we will see how the flavor profile stands up to the vanilla candy coating.
If not, plain cake all the way!


Congrats on getting that sweet little gadget! I am sure it has made making cake pops a lot easier. Ha!-that means that you can dedicate more time for decorating those little gems.
ReplyDeletePlain or dipped, they always get my vote!
flourtrader.blogspot.com