Showing posts with label sweet. Show all posts

Tuesday, September 25, 2012

Chai Spiced Sugar Cookies

Friends!

I have big news!!

I met someone who knew me from my blog!!

He came to baking club last Friday and after introducing himself, said to me "Hey, you're that girl who writes On Sugar Mountain right?"

I almost died of excitement right there. I thought perhaps someone had mentioned to him that I blog, but then my VP told me he had been in the back baking cupcakes and talking about my Red Lobster Biscuits and had no idea I was the head of the club.

Life is good.


So I believe it's time to celebrate, and I see no other way than to whip up these comforting Chai Spiced Cookies and scarfing down as many of them as possible, with or without a Chai Tea Latte.

Whether you've had a bad day and need a pick me up OR have had a great day and believe you deserve something awesome (which you totally do, good day or bad day) these cookies will definitely hit the spot.


I have to admit I was a little concerned about adding black pepper to the range of spices, but the cookies come out wonderfully warm and spicy without any trace of just "pepper" flavor.

Other than pepper you've got ground ginger, allspice, and once again my vietnamese cinnamon. I can never find cardamom so I just threw in equal parts of the other spices to make up for it and no harm done.


I loved how this recipe incorporates the spices into the cookies. Instead of just rolling the cookies in a sugar spice mixture, you first mix all of the spices and all of the sugar for the recipe in one bowl, and reserve a smidge for rolling, and then beat the rest of the sugary spicy mixture with the butter. I find that it really incorporated the flavors into every bite of the cookie.


Mmmmm cookies.

These cookies are best eaten the day of when they are still pillowy soft and warm from the oven, but if you keep them in a tupperware they will stay for a few days.

You know, in case you aren't like me and can't eat dozens of cookies in one day.

I hope you are all have fantastic weeks as well! If not, spend some time in the kitchen with these Chai Cookies. You can use your hands to mix the dough, and I find kneading cookie dough to be one of the best stress relievers out there.

Right after eating said cookie dough instead of baking it.


Happy Baking!


Chai Spiced Sugar Cookies Via MyBakingAddiction

1 3/4 cups white sugar
2 1/2 tsp cinnamon
1 tsp ground ginger
1 tsp ground cardamom (or just more of the other spices if you can't find it)
1/2 tsp ground allspice
1/4 tsp ground black pepper
2 3/4 cups flour
1 tsp baking soda
1/2 tsp baking powder
1/4 tsp salt
1 cup butter, softened
1 egg
1/2 tsp vanilla

1. Preheat oven to 350 degrees and line baking sheets with parchment paper.
2. In a large bowl whisk together sugar, cinnamon, cardamom, allspice and black pepper until evenly incorporated. Reserve 1/4 cup of this mixture in a small bowl for rolling the cookies.
3. In a separate bowl, combine flour, baking soda, baking powder, and salt.
4. Cream butter and sugar-spice mixture until light and fluffy, then beat in egg and vanilla. Add flour mixture to butter mixture, mixing until well incorporated. (use clean hands if necessary!)
5. Scoop out about 2 tsp of dough, roll into ball, and roll in reserved sugar-spice mixture. Place on prepared baking sheet, leaving about 1/12 inches between cookies for spreading
6. Bake at 350 degrees for 8-10 minutes. They will look undercooked - take them out anyway and let them cool for 2 minutes on the sheet before removing to wire rack.

Tuesday, September 11, 2012

Salted Caramel Kiss Cookies

Hello friends!

So I survived the first week of classes; I cannot tell you how glad I am that is over. Slowly but surely I am getting back into the groove here at Rutgers, and for those moments when a long hot shower won't cut it in terms of stress-relief, there are always these cookies to fall back on....


Salted. Caramel. Cookies.

Seriously.  Do not be intimidated by the whole "browning butter" deal. I waited far too long to attempt a recipe that included this step, and I now regret it. It is simple yet oh so satisfying and, of course, you can impress all your friends. ;)


See? If I can manage to brown butter without turning it into a black, burnt-out mess, so can you. The key is to stir constantly once all of the butter has melted to keep it from burning on the bottom. Oh and the smell? Slightly nutty, slightly caramel-y, all delicious.

Once it cools you mix in some brown sugar, eggs, and the typical flour and baking soda/powder elements. The dough is a tad soft so you may want to store it in the fridge for 30 minutes, unless you like your cookies thinner. If you like the look of mine, 30 minutes is perfect.


Another simple way that this recipe steps it up? By rolling the cookie dough in a brown sugar/white sugar mixture. Pure genius. The molasses flavor in the brown sugar really brings out the browned butter in the dough. Add a caramel-filled kiss in the center and a few flecks of sea salt, and you have one cookie that is sure to take away the stress of the day in every bite.


Impressively adorable, yet simple to make. Not to mention sharing them with my co-workers brightened up everyone's day.

I think this is going to be the new mantra of "On Sugar Mountain". The semester is going to be full of exciting, yet often stressful moments, and I am determined to show how just a little bit of love and effort in the kitchen can really pay off. Stress-reducing is not the only thing these cookies are great for; perhaps you're a freshman and want to make some friends? Or a transfer student? Or maybe you just want to make people smile? There is no better way to make friends than by sharing food, especially if it's food you made. The thought makes people smile, and it's a great way to get your "foot in the door" so to speak. New acquaintances will have something to remember you by, and who knows, maybe they will make something in return. I have said it before and I'll say it again: world peace can be achieved through cookies. Or cake. If we all take a moment to think of making others, as well as ourselves happy, we can do a lot of good with just a little bit of sweetness.

I shall go now, before I wax sentimental (though I think I already have!) but check back soon for more deliciously inspiring sweets to make, bake, and share with your friends!

Happy Baking!


 Salted Caramel Kiss Cookies Via Cookies&Cups

14 tbsp butter, preferably salted, cut into slices
1 3/4 cup brown sugar
2 cups + 2 tbsp flour
1/2 tsp baking soda
1/4 tsp baking powder
1 tsp salt
1 egg + 1 egg yolk
1 1/2 tbsp vanilla
1/4 cup white sugar
1/4 cup brown sugar
roughly 24 Caramel Kisses, or caramel filled chocolate candies

1. Preheat oven to 350 and line your baking sheets with parchment paper
2. Put butter in a medium saucepan over medium-high heat. Let butter melt and then stir constantly until butter turns a caramel/brown color. Let cool 15 minutes.
3. Mix together flour, baking soda, baking powder and salt in bowl. Set aside.
4. Pour cooled butter into a medium-sized mixing bowl and add 1 3/4 cup brown sugar. Mix with hand mixer until no lumps remain. Then beat in egg, yolk and vanilla.
5. Add flour mixture to butter mixture and mix until dough comes together. At this point you can let the dough chill in the fridge for 30 minutes or just continue making cookies.
6. Mix together white sugar and brown sugar in small bowl. Roll dough into heaping tablespoon-sized balls and then roll ball in sugar mixture. Place on prepared baking sheet, leaving room for spreading.
7. Bake at 350 for 12-14 minutes or until edges just begin to brown. DO NOT overbake.
8. As soon as cookies come out of oven, place a caramel kiss in the center, pushing down slightly. Dust cookies with sea salt. Then let cool on wire rack.

Tuesday, August 7, 2012

My 100th Blog Post & Oatmeal Chocolate Chip Cupcakes

Hello friends!

I still can't quite wrap my head around the idea that this is my 100th post on OnSugarMountain. It's been a little over a year since I started this baking blog, and it's taught me so much.

Some quick tidbits I've learned about baking:

1. Cupcakes are not always easy. Do not look down upon a cupcake. They can be quite awesome and take more work than you might imagine. See Banana Split Cupcakes & Homemade Hostess Cupcakes


2. Stuffing anything with nutella is an AWESOME idea and we should all try to do it as often as we can. See Nutella Stuffed Sugar Cookies & Nutella Stuffed Cupcakes


3 .Muffins are NOT just ugly cupcakes. Muffins can be sweet little mouthfuls of heaven without any frosting. See Strawberries & Cream Muffins


4. Eggless Cookie dough exists, can be eaten without getting sick, and is freaking fantastic. See Cookie Dough Topped Brownies


5. Baking can bring people together in ways that nothing else can. We can make friends, stuff our faces, and do it all while helping out those less fortunate than us.


On a larger scale and with the risk of sounding philosophical, this blog and all the adventures that accompany it led me to learn a great deal about myself. I know I said this blog was to document my adventures in baking until I opened up a bakery of my own, but I've realized something; the part I love the most about baking, eating, food, all of it, is the experience, and I could never turn it into a job that I'll eventually resent. Seeing people's faces light up when I bring in brownies to work, or hearing a collective "mmmm" as everyone takes a bite, I know I've brightened up their day, if only for a moment. I love that.

I love it so much that turning into something I will stress about is not an option. I could never risk turning baking into an activity I look at with exhausted eyes and think "I so do not want to bake today." Food, for me, will always be about the experience, about enjoying every single morsel of a meal and most importantly, sharing it with friends and family.


So opening my own bakery may not happen, but that doesn't mean I can't change the way we all have come to see food. How can I do this you ask? By doing exactly what I am doing right now. Blogging. Writing. Sharing. Doing. Food is such an intrical part of our lives but we've let it fall to the wayside in lieu of other "more important" things to stress about, such as our jobs, the economy etc etc. OR we stress about food too much and jump on every dietary bandwagon that rears its ugly head.

I want to remedy this. I want people to experience the love that can come from food. Our lives, now more than ever before, need balance. What better way to balance the stresses of our everyday lives than relaxing to come together around a table?

And so, drumroll please....

I'm starting a new blog this September!


On Sugar Mountain will still be up and running twice a week, but I hope that you will will come check out my new blog, The Foodie Files, where I hope to show people just how important food is to each and every one of us.

Phew. Lots of sharing going on in this post. Now it's finally time for the food!


Oatmeal Chocolate Chip Cupcakes. Make them. You'll love them. I promise. It's like a chewy oatmeal cookie, riddled with chocolate chips, baked into tiny cakes then covered with a mind-blowing cinnamon sugar frosting. Give one of these to a new acquaintance and I'm betting you two will be bffls in no time.

Lastly, I want to thank each and every one of you who read my blog. It makes my day to see comments posted about what I bake or a new follower pop up on my Dashboard. I've met wonderful people in creating this blog and I hope to meet so many more.

Until next time,

Happy Baking!


Oatmeal Chocolate Chip Cookies Via HowSweetEats

3/4 cup brown sugar, loosely packed
1 egg
1/2 cup butter, melted and cooled
2 tsp vanilla
1/2 cup oats
1 1/4 cup flour
1 1/4 tsp baking soda
1/4 tsp cinnamon
1/4 tsp salt
2 tbsp milk
1/2 cup chocolate chips tossed in a sprinkle of flour

1. Preheat oven to 350 degrees and line one 12-cup muffin pan with liners.
2. Beat egg and sugar until smooth, then beat in melted butter and vanilla.
3. Add oats, flour, baking soda, cinnamon and salt to egg mixture and stir until incorporated. Stir in milk then fold in chocolate chips.
4. Pour 1/4 cup of batter into cups then bake at 350 for 16-18 minutes or until tops spring back lightly when touched. Let cool in pan for 5 minutes before removing to wire rack to cool completely.

Cinnamon Sugar Chip Frosting

1 cup butter, softened
2 cups powdered sugar
1/2 cup brown sugar, loosely packed
1/4 tsp cinnamon
1 tbsp vanilla
1/3 cup chocolate chips
1 tbsp milk (optional)

1. Beat butter until light and creamy, then slowly beat in powdered sugar.
2. Add brown sugar, cinnamon and vanilla and beat until fluffy. Add milk if frosting is too thick.
3. Fold in chocolate chips.

Friday, July 27, 2012

Oatmeal Creme Pies

Hello friends!

Have any of you ever tried using molasses in your recipes?


Have you noticed it smells absolutely awful?

Because it does. I've always assumed it would smell warm and spicy, but as I opened this bottle my nose was assailed by a scent I can't even really describe. Let's just call it unappealing. I would've loved to switch it out for honey, which the internet told me I could, but what if this ingredient was the ingredient to push these oatmeal creme pies over the edge, into the realm of "yum" ? I found these on BakedPerfection and I thought to myself 'it has been awhile since I've whipped up anything resembling a whoopie pie, over six months in fact.' Waiting that long sounds like such a crime, don't you think?


However, between the overwhelmingly weird smell of the molasses and the fact that the dough looks like oatmeal someone left on the counter for six hours, I must admit my hopes were not high. But then the oven did its magic and in 10 short minutes I had these! Add some frosting that tastes just like a melted marshmallow, sandwich two cookies together with it, and ta-da!


Little Debbie eat you heart out.

So I guess molasses is important to the recipe. I'll just have to suck it up and bear with the strange odor it holds because these cookies are too yummy to not make again and again.

Happy Baking!
Oatmeal Creme Pies Via BakedPerfection

1 cup butter, at room temp
3/4 cup packed brown sugar
1/2 cup white sugar
2 eggs
1 tbsp molasses
1 tsp vanilla
1 3/4 cups flour
1/2 tsp salt
1 tsp baking soda
1/4 tsp cinnamon
1 1/2 cups oats

1. Preheat oven to 350 degrees and line cookie sheets with parchment paper.
2. Sift together flour, baking soda, salt and cinnamon in medium bowl and set aside.
3. In large bowl cream together butter and both sugars until well incorporated. Beat in eggs, one at a time, then finally add in the molasses and vanilla. Beat all until well incorporated.
4. Pour flour mixture into wet ingredient mixture and mix until just combined, being careful not to overmix. Stir oats in by hand with wooden spoon.
5. Drop rounded tablespoonfuls of dough ont the prepared cookie sheets, leaving plenty of space for spreading. Bake at 350 for 10-12 minutes or until edges just begin to brown.
6. Let cool on pan for 5 minutes before removing to wire rack to cool completely.

Marshmallow Filling

1/2 cup shortening
1 7oz jar Marshmallow Fluff
1/3 cup powdered sugar
1 tsp vanilla
2 tsp hot water
1/8 tsp salt

1. Dissolve salt in hot water and let cool.
2. Beat together shortening, fluff, sugar and vanilla until fluffy, 3-4 minutes. Add water and mix until well combined.
3. Spread filling on one side of a cookie, then place another cookie on top, pushing down slightly to sandwich them together.

Wednesday, May 23, 2012

Red Velvet Muffins

Hello all!

I know it's been almost a week since I last posted but I have been busily preparing for a VACATION! Now I know what you're thinking: "Isn't she already on summer vacation?" Technically, yes, but this is a vacation I have been looking forward to for years since the last time I traveled. I get to journey with my boyfriend and his family up to Maine for Memorial Day weekend...

and oh, did I mention we are staying on an island off the coast of Maine? My boyfriend's family has owned a home on Great Diamond Island for generations, where the homes have names instead of numbers (which is awesome in and of itself). Beautiful, quiet, serene: this is my kind of island. Not to mention I fell in love with the city of Portland last time I visited there; great food, cute shops, movies for $5...and of course the best lobster around.

The only negative is that his grandparents' home (which is where we are staying) does not have internet access, so I will be posting all of the lovely vacation photos once I return after Memorial Day. With that said, let me share with you one of my newest creations in my quest for baking fame. Hopefully these will hold you over until I return.

I give you....


The Red Velvet Muffin

Now I'm sure I am not the first one to think up a red-velvet-inspired muffin, but I have to say I am pretty darn impressed with how these came out. Bits of white chocolate midst a perfect scarlet hue, and a cake-like texture with just a slight hint of cocoa flavor; I am lovin' these muffins. True, I love almost all muffins, but there is just something purely wonderful about seeing your own idea transform into a successful sweet treat.


I hope these inspire you to create one of your own decadently delicious muffins, or to just test these out to share with friends. These are definitely the way to go if a full slice of red velvet cake seems over-the-top.

Well, I am off to the lovely coast of Maine; enjoy your Memorial Day and I will be back before you know it!

Happy Baking!


Red Velvet Muffins Via Yours Truly

2 cups flour
1/2 cup sugar
1/4 cup vegetable oil
1/2 cup buttermilk
1 egg
1 tsp vinegar
2/3 cup white chocolate chips
2 heaping tbsp cocoa powder
1/2 tsp baking soda
1 tsp baking powder

1. Preheat oven to 350 degrees and grease one 12 cup muffin pan with cooing spray
2. Combine flour, sugar, cocoa powder, baking powder, baking soda, and white chocolate chips in a medium bowl.
3. In a separate bowl, beat together egg, oil, buttermilk and vinegar. Quickly pour wet ingredient mixture into dry ingredient mixture and stir with large wooden spoon until just combined. Do not overmix.
4. Fill muffin cups 2/3 way full with batter and bake at 350 for 18-20 minutes or until toothpick comes out clean.
5. Let cool 5 minutes in pan before removing to wire rack to cool completely.
3. In a separate bowl

Wednesday, May 9, 2012

Birthday Cake Fudge

Hello all,

I told you I had to satisfy all the craving that have built up since I hurt my leg, and I have to amdit that after all of the sweets at Rutgers Day, I was regretting not taking any fudge home at the end.


I mean seriously, who doesn't love a giant piece of fudge?

Rutgers Student Bakers' favorite fudge is a cookies 'n cream recipe, but I wanted to try one I've had pinned on my Pinterest boards for months: birthday cake flavored. Yum.

So I finally got myself to stop drooling over my keyboard and get to work. I even had this great idea to use one of these pans:


to make equally-sized, easy-to-make fudge pieces. It's actually a silicone brownie pan from Wilton but I'm sure they won't mind if I MacGuyver it to my own delicious purposes.

I have to admit though, I do wish I had tried this one out with the baking club, or at least with a buddy, When she writes to "move quickly", she's not kidding. This fudge started to harden as soon as I turned off the heat. Attempting to turn half of it blue was a bit too much for me, but I managed to get it all into the pan and covered with, what else, rainbow sprinkles.


Phew. Now the good news is that my idea worked and the little bits of fudge came out perfectly from the silicone pan, and are adorable. The bad news? What the kitchen looked like minutes after I got all of it into the fridge to cool.


I've never seen so many dirty pots/pans/silverware. Sigh. It's times like these when I wonder what I would give to have a dishwasher up at college.

But after I salvaged the kitchen I rewarded myself with a taste, and it was like smooth, creamy, sugary perfection. I could've used even more cake mix in the recipe but really, these are quite addicting as is.


These would be a fabulous birthday gift for anyone with a sweet tooth. Or, you know, for yourself...it's someone's birthday somewhere out there...

Happy Baking!


Birthday Cake Fudge Via Mrs. Bettie Rocker

3 cups sugar
1 1/2 sticks butter/margarine
1 (5oz) can evaporated milk
1 (7oz) jar Marshmallow Fluff
1 (12oz) bag white chocolate chips
1/4 cup yellow cake mix powder
1 tsp vanilla
blue food coloring (optional)
rainbow sprinkles (optional)

1. Grease/foil one 8in or 9in square baking pan, or use a silicone baking pan greased with cooking spray.
2. Add margarine, sugar, and evaporated milk to a large saucepan. Bring to a boil and let boil for a full 4 minutes. Remove from heat.
3. Add fluff, white chocolate, cake mix, and vanilla, and stir continuously until all the chocolate has melted and the consistency is uniform.
4. Moving quickly, pour half of the fudge into a heatproof bowl and dye it blue (or whatever color you want).
5. Fill pan with blue fudge first, then the remaining white fudge on top, pulling a knife through to marble (if you want, I always like layers.) 
6. Cover top of fudge with sprinkles and let cool to room temp before storing in fridge for 2 hours to harden.

Thursday, April 19, 2012

If you like Pina Coladas, and Getting Caught With Cupcakes...

Hello all,

I know, I know, its's a corny blog post title, but I honestly couldn't help singing it to myself while I was baking these cupcakes, or while eating them.


We had a little setback in the weather here in New Jersey for awhile (as if that's shocking to any of us who have lived here for our entire lives) but there's finally been a breakthrough! We hit 80s and now are headed to a balmy mid-70s range for for the rest of the week. So, with all the sun, warmth, and fresh air, I thought these pina colada cupcakes would be the perfect way to go during my month of cupcakes...and I was right.

I have eaten not one, not two...but many of these little cakes as they sat on my kitchen table, staring at me with their toasted coconut, just begging to be gobbled up before anyone notices they're gone.


After being treated to the Banana Split Cupcakes awhile back, some of my peers asked me if I could bring them a few of these to our next class. For once I actually wanted to say "there are no more" because I was thinking to myself "there won't be anymore after I get to them" but of course I said I'd be happy to.

But then, who would've thought this late in the semester I'd have such luck, my professor cancelled class today. It's a sign from God - I was meant to have all of these cupcakes to myself.


Is it going to cause a serious stomach ache? Most definitely. Do I care? Not in the slightest.

Every time I eat one I am reminded that there is roughly one WEEK left of classes for the entirety of my junior year, and I am that much closer to Summer Vacation.

I hope these send you off to a blissful summer daydream as well.

Happy Baking!


Pina Colada Cupcakes Via GloriousTreats

2 1/2 cups flour
1 1/2 tsp baking powder
1/2 tsp baking soda
1/2 tsp salt
1 3/4 cups sugar
3 eggs
1 cup vegetable oil
1 tsp vanilla
3/4 cup sour cream
1 1/2 cups crushed pineapple, drained slightly

1. Preheat oven to 350 degrees and line two 12-cup muffin pans with liners.
2. In a medium bowl sift together flour, baking powder, baking soda, and salt.
3. In a separate bowl, beat together eggs and sugar until it reaches a uniform consistency. Slowly beat in oil and vanilla.
4. Stir in sour cream and crushed pineapple until well combined.
5. Add flour mixture to wet ingredient mixture and beat until just combined.
6. Fill cupcake liners 3/4 way full and bake at 350 for 20-24 minutes, or until a toothpick comes out clean.

Coconut Frosting Barely Adapted from Baked Perfection

1/2 cup butter, softened
1 tsp vanilla extract
3 cups powdered sugar
4 tbsp coconut milk

1. Cream butter and coconut milk, then add vanilla.
2. Beat in powdered sugar, a cup at a time, until desired consistency is reached.


Wednesday, March 14, 2012

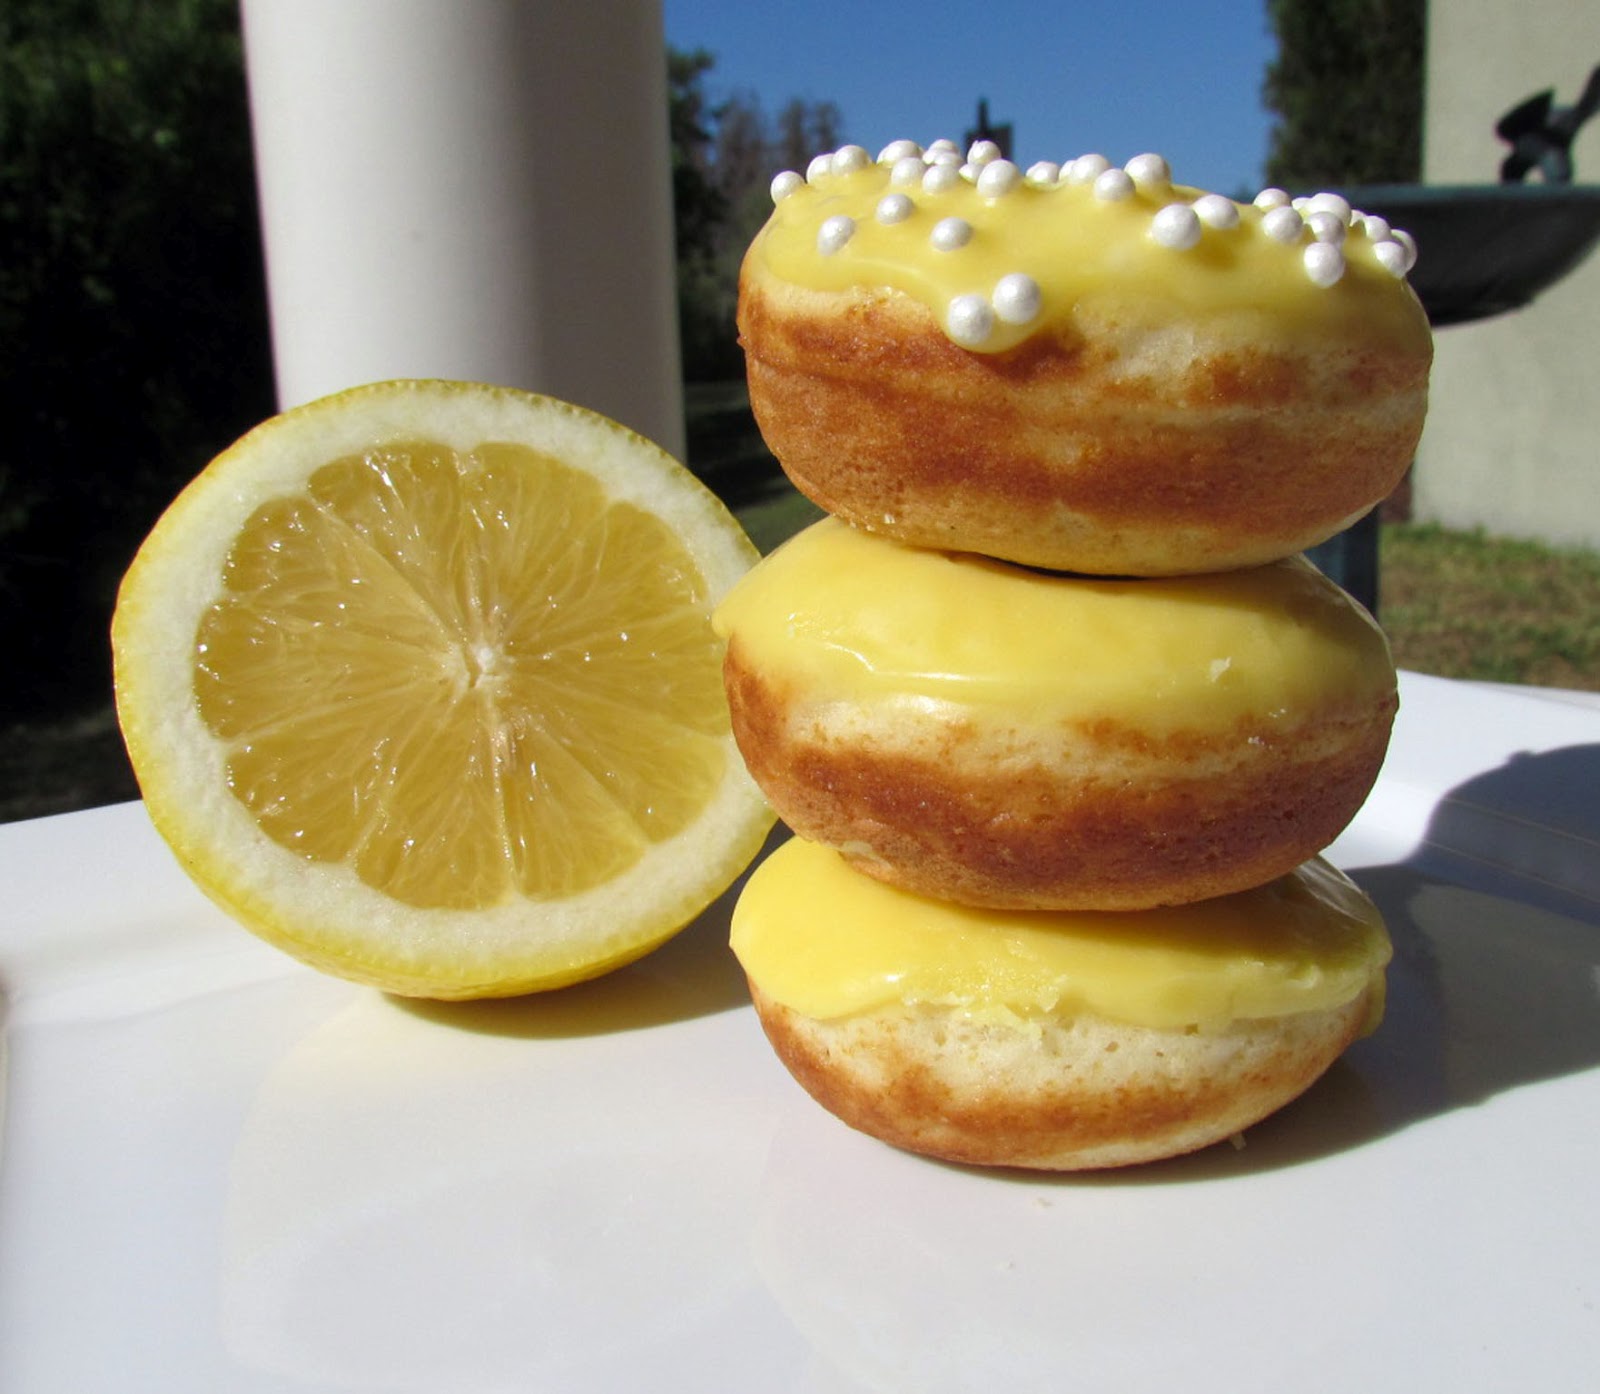
Fresh Lemon and Strawberry Frosted Donuts

Hello all,

Daylight Savings Time has passed this weekend and I have to tell you, I am LOVING the extra sunlight. It just makes the days so much cheerier, granted I am currently writing to you from Florida (the Sunshine State). I am sure when I get back to NJ I will be greeted by the lovely gray, overcast weather I have come to call my own.


But while I'm still down here catching the rays, I thought I'd share these fresh fruit-frosted donuts with you!


I can't say I looked up the lemon frosting, but sadly I did discover that Strawberry Frosted Donuts, from say Dunkin Donuts, are not frosted with anything that resembles real strawberrries. Gross. 

How are we still okay with that? I mean I understand that if you use real strawberries it wont be as smooth and glossy, but I think that might very well be a sacrifice we are willing to make for real fruit frostings.


Regardless, mine utilize the wonderful fresh strawberries down here in Florida, along with some lovely fresh lemons as well.


I ran into some trouble with lighting for my photos (when does that not happen) but discovered that the sun was the perfect accompaniment to my donuts. Now if only NJ was this bright all the time I'd take all my photos outside each morning!

I've included the basic sour cream donut recipe below along with the new fruit glazes/frostings. Feel free to switch out the lemon juice for lime (key lime donuts anyone?) or use your favorite fruit in place of the strawberries. The possibilites are endless, not to mention delcious.

Happy Baking!


Sour Cream Donuts (makes about 2 dozen mini donuts)
1 1/3 cups all purpose flour
1/3 cup sugar
1 tablespoon baking powder
1/2 tsp salt
1/2 cup milk
1/4 cup vegetable oil
1/4 cup sour cream
1 egg
1 tsp vanilla

1. Combine all dry ingredients in a mixing bowl.
2. In separate bowl whisk together remaining ingredients. Pour liquid ingredients over dry ingredients. Using a mixer on medium speed, blend until smooth.
3. Fill each cooking reservoir with about 2 tbsp of batter.
4. Bake about 4-5 minutes or until donut springs back when touched.
5. Glaze or coat with powdered or cinnamon sugar.

Fresh Lemon Frosting

2 cups powdered sugar
2 tbsp fresh lemon juice
splash of milk

1. Sift powdered sugar into a medium bowl. Add lemon juice and begin to stir. Add milk slowly, until consistency is smooth but still thick.
 
Fresh Strawberry Frosting

1 cup powdered sugar
1/4 cup strawberries
splash of milk

1. Sift powdered sugar into medium bowl. Pulse straberries in food processor until completely chopped. Scrape strawberry puree into powdered sugar and whisk until it comes together. Add splash of milk as needed to create smooth consistency.

 To frost donuts: dip donut in frosting, pull up and allow excess to drip off. Poke hole in center with finger to allow frosting to form to shape of donut. Then allow to dry on cooling rack or dip in sprinkles.