Wednesday, June 29, 2011

I Demand More Donuts!

Hello everyone!

So good news: guess who got a new camera! Yep, I did. So be prepared to be blown away with high-def photos! (By high-def I mean photos that are just so much clearer than the ones I have been taking with my iPhone). After getting the new camera, I thought I just had to test it out, and what better way than with more donuts?

Since I did vanilla donuts for Father's Day, I thought I'd take my mom's tastes into consideration this time, and do chocolate donuts. I found a chocolate donut recipe in my nifty little BabyCakes Recipe Book (which comes with the Donut Maker) and got to work.


I am going to become so obsessed with this donut maker; I just know it. These only take 4 minutes! Well, it takes more like 30 minutes if you add in the prep time. Oh and before I forget, if you plan on trying this recipe (or any recipe that requires piping batter) you need to take this tip on filling the pastry/Ziploc bag from LovefromtheOven, using the glass to hold the bag open is genius.

Now, be prepared for a multitude of adorable donut photos!


So there you have it: more delicious donuts in under an hour. If you don't own the Donut Maker, I would suggest buying the donut pan, which might be more efficient since it has 24 donut molds as opposed to the 6 in my donut maker. As far as taste, I am much more inclined to vanilla donuts with chocolate frosting, but these were pretty good. My mom swears they are amazing, so I would take her word over mine since shes the chocolate donut aficionado.

BabyCakes Chocolate Donuts with Vanilla Frosting

1 1/4 cups flour
1/2 cup sugar
1/2 cup cocoa powder (I used Hershey's)
1 egg
1 tbsp baking powder
3/4 cup buttermilk
1/4 cup vegetable oil
1 tsp vanilla

1. Whisk together all dry ingredients in one large bowl.
2. To the dry ingredient mixture, add the egg, buttermilk, oil and vanilla. Using a hand mixer, blend until just smooth.
3. Fill donut pan/maker cavities with approximately 2 tbsp of batter.
4. Cook 4-5 minutes or until toothpick comes out clean.
5. Let cool and then frost or coat with powdered sugar

Vanilla Frosting

1/4 cup melted butter
1 1/3 cups powdered sugar
1 tsp vanilla
1 tbsp warm water

1. Blend melted butter with powdered sugar.
2. Blend in vanilla.
3. Blend in warm water until it reaches frosting consistency.

Sunday, June 26, 2011

Cinnamon Sugar Donut Muffins

I know what you are all thinking...donut muffins? Yes, there is such a thing, and apparently it's quite a big deal on the blogosphere (and by blogosphere I really just mean the baking blogs I follow). As soon as I saw a recipe for them on my FoodGawker App, I just had to try them. I mean really: donuts are awesome, muffins are awesome, donut muffins therefore must be uber awesome (and they were!).


The recipe I decided to use comes from KokoCooks and I have to say, they turned out pretty amazing. It's a simple enough recipe, though the slight lumpiness of the batter worried me (they turned out fine though). The only suggestion I would make, and this really depends on how much you like cinnamon, is to add some cinnamon to the batter in addition to rolling the muffins in the cinnamon sugar. I absolutely love the spice and can't get enough of it, but if you're indifferent, then just stick with the cinnamon sugar. It's delicious either way; trust me.


If you aren't a fan of cinnamon at all, then just go onto Foodgawker and search "donut muffins" and there are a good dozen recipes for just plain sugar donut muffins, chocolate donut muffins, and even (gasp) sugar donut muffins filled with caramel. These are definitely going to be a new staple in my kitchen. :)

Cinnamon Sugar Donut Muffins
from KokoCooks and adapted from BakingBites
makes 12 muffins

¾ c sugar
1 large egg
1 ½ c all purpose flour
2 tsp baking powder
¼ tsp salt
¼ tsp ground nutmeg
¼ c vegetable oil
¾ c milk
1 tsp vanilla

for cinnamon sugar:
3 Tbs sugar
1 tsp cinnamon


1. Preheat oven to 350 degrees F and grease (in my opinion heavily) a 12-cup muffin pan.
2. In a large bowl, beat together the egg and the sugar until pale yellow (roughly 1-2 minutes). In a separate bowl, sift together flour, baking powder, salt and nutmeg. 
3. In another bowl, combine milk, vegetable oil and vanilla.
4. Pour dry ingredient mixture over the egg mixture and stir until just combined, then add liquid ingredients, again stirring until just combined (batter will be slightly lumpy).
5. Fill muffin cups 2/3 full and bake at 350 degrees for 15-18 minutes or until a toothpick comes out clean.
6. While cooling, mix together sugar and cinnamon. While muffins are still warm (not hot) roll them in the cinnamon sugar and then let cool completely on a cooling rack.

Thursday, June 23, 2011

Fumbling Around with Focaccia

Well, it's about time to take a turn towards savory baking. I had been dying to try out a focaccia recipe and my mom needed bread to go with dinner (penne with clam sauce!), and would you believe it's so much easier than I thought! Some students in my Foods Lab last semester made some using a basic recipe, which I tweaked quite a bit for this post.


So basic ingredients are: active dry yeast, flour (all purpose is fine but I happened to have bread flour handy), sugar, water, olive oil, and salt. Other than that, you can pretty much customize your toppings. I went with a basil, oregano and sea salt combo.


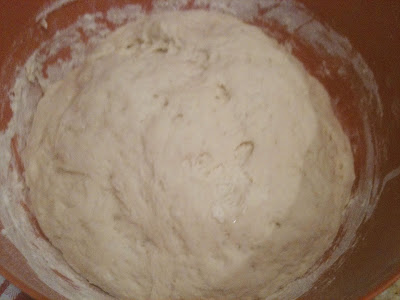
Here's how the dough looks once it doubles after 30 minutes of rising in a warm, dark place (aka my pantry). It's so awesome to see it expand like that in such a short time; although now my pantry does smell a whole lot like bread. Not that I mind. :)

I'll add the whole recipe at the end of the post, but I decided not to go completely step by step with photos since this recipe is really quite simple. I am not a bread baker, and this was my first time using yeast. But the good news is that this is a pretty forgiving recipe since formation of gluten is actually a good thing (not like in cakes). So knead away my friends!


Now the original recipe wanted me to mix the toppings with the olive oil, but I was worried that would clump and I wanted to make sure there was an even distribution of spices. So instead I brushed the entire top of the dough with olive oil and then sprinkled the seasonings over. At this point, it's time to pop it in the oven! Did I mention this recipe will fill your entire kitchen with the amazing smell of Italian spices and bread? Because it does, and it's downright awesome.


And there you have it! Fantastic Focaccia from your own oven. I have to say, now that I know I can do this, I plan on making this a lot more often, with dozens of different toppings (sundried tomatoes and mozzarella anyone?)

Focaccia

for the dough:
1 1/2 cups all purpose flour
1/4 tsp salt
1/2 tsp olive oil
1 tbsp active dry yeast
1 tsp sugar

for the topping:
olive oil (enough to coat the top of the dough)
oregano and basil (roughly 1-2 tbsp)
(feel free to add as much or as little toppings as is preferable to you; I just sprinkled both spices over the dough until I felt it was enough)


1. Mix 3/4 cup of flour with salt and olive oil
2. In a separate bowl, add 1 tbsp + 2 tsp of warm water to yeast and sugar. Mix thoroughly and let stand for roughly 10 minutes, or until frothy/foamy
3. In a large bowl, mix together flour mixture and yeast mixture with 1/2 cup of warm water
4. Knead the dough and add the remaining flour as needed to lessen the stickiness of the dough. If it becomes too dry, just add a little more warm water
5. Cover the bowl with a cloth and set in a warm, dark place to rise for 30 minutes
6. Preheat oven to 400 degrees F
7. Remove cloth and knead dough. Divide into two portions and roll (or stretch) out to 1/4 inch thickness, making either a round or oval shape. Place each on a cookie sheet and let rise in a dark place for an additional 10 minutes
8. Slash or poke the dough with your fingers (make sure to make indents over the entire dough)
9. Brush dough with olive oil and sprinkle toppings
10. Bake at 400 degrees for roughly 13-15 minutes, then turn the broiler on high and let cook for an addtional 1-2 minutes (watch carefully so it does not burn).
11. Let cool, cut into strips and serve!

Monday, June 20, 2011

Father's Day Donuts

Happy Belated Father's Day!

As I mentioned, I had originally planned to make a double chocolate layer cake for my Dad as his gift, but the pastry gods were not having it. The cake was extremely dry, so what was I to do?

Luckily, I had just acquired the BabyCakes Donut Maker!


What better way to solve the problem than to whip up some for dear old dad..who happens to LOVE glazed donuts. Since I am a complete newbie when it comes to donuts, I decided it would be best to stick to one of the recipes that was included in the kit.

The recipe was for Sour Cream Donuts with a Vanilla Glaze, which stressed not to over beat the mix. I was successful in mixing, although filling said donut maker proved to be another adventure entirely.


Turns out spooning the batter in is not the most efficient manner in which to fill the donut maker. So, next time around I was ready with a Ziploc bag filled with the same batter. Oh, and did I mention these donuts cook in all of 4 minutes?!


Ah, now that is more like it! Isn't it adorable? But, more importantly, it's delicious! I decided to coat the slightly overcooked first batch in powdered sugar, while glazing the second and third batches. The results = awesome. Also, since these are baked as opposed to fried, the calorie count isn't quite so bad. They are also tiny, so these are a much better (and more cost effective) alternative to Dunkin Donuts.

BabyCakes Sour Cream Donuts with Vanilla Glaze (makes about 2 dozen donuts)

1 1/3 cups all purpose flour
1/3 cup sugar
1 tablespoon baking powder
1/2 tsp salt
1/2 cup milk
1/4 cup vegetable oil
1/4 cup sour cream
1 egg
1 tsp vanilla

1. Combine all dry ingredients in a mixing bowl.
2. In separate bowl whisk together remaining ingredients. Pour liquid ingredients over dry ingredients. Using a mixer on medium speed, blend until smooth.
3. Fill each cooking reservoir with about 2 tbsp of batter.
4. Bake about 4-5 minutes or until donut springs back when touched.
5. Glaze or coat with powdered or cinnamon sugar.

Vanilla Glaze

1/4 cup melted butter
1 1/3 cups powdered sugar, sifted
1 tsp vanilla
2-2 1/2 tbsp hot water

1. Combine melted butter and powdered sugar, stirring until well blended. Stir in vanilla.
2. Blend in hot water until smooth.

Thursday, June 16, 2011

Cookie Spree Finale: Chocolate Chip Cookies

I thought I would wrap up my little mini series on cookies with a classic: chocolate chip. Now I will tell you all right now you are seeing the best ones out of the bunch, as the first batch looked much more like one giant cookie sheetcake as opposed to individual cookies (turns out you need much more baking powder than I thought). However, with a few adjustments, we had success on the home-front (aka my kitchen).


When I started today, I thought I would take the idea from the last cookie recipe (on Salted Double Fudge Cookies) and implement it here with these cookies. Turns out, using less flour and sticking the dough in the fridge for 10 minutes will not help the cookies hold their shape. No, in fact, without enough baking powder or flour, they will instead spread into a giant mess all over your cookie sheet. I would include a photo for you, but I was so disappointed that I threw the cookies (if you could call them that) away before even thinking of taking a photo for this post.


But, with some determination (and more flour and baking powder of course) I was able to conjure up a dough that was, well, more "doughy" and did not stick to my hands. Naturally I ran out of chocolate chips after this batch, so the tension was high. Would they spread again? Would they just taste like flour? 

Well, they definitely held their shape more effectively than the previous batch, so my thoughts were optimistic.


Twelve minutes later....


Success! The cookies turned out delicious and, if it weren't for the fact that I am now out of chocolate chips, I would be off making another batch or two of these. This ends my cookie spree; I would like to go on and on with snickerdoodles, molasses etc, but Father's Day is coming up and I must work on my gift for my Dad: double chocolate cake. :D

Sugar Mountain Chocolate Chip Cookies

1/2 cup brown sugar
1/2 cup white sugar
1/2 cup salted butter
1 egg
1 1/2 cups flour
2 tsp baking powder
1 tsp vanilla
1 cup chocolate chips

1. Preheat oven to 350 degrees. 
2. Cream butter and both sugars until sugar is well incorporated. Beat in egg and vanilla.
3. Sift flour and baking powder together and stir into the butter mixture (use hands if necessary).
4. Stir in chocolate chips.
5. Drop 1 tablespoon-sized spoonfuls of dough onto cookie sheet, roughly 1 inch apart.
6. Bake at 350 degrees for 10-13 minutes, until just starting to brown on edges.

Sunday, June 12, 2011

Cookie Spree Part 2: Salted Double Fudge Cookies

I am sorry for the delay in posts (that is, if anyone is actually reading this blog). I have family staying with me and so things have been a bit hectic on the home front. However, I did get a chance to finally try out the next cookie recipe I had saved on my favorites on foodgawker. This one is for Salted Double Fudge Cookies, via KeepItSimpleFoods. A simple recipe, but be warned, its simplicity does not detract from its utter genius, as it is one of the best chocolate cookies I have ever had. The fact that it is a simple recipe will most likely lead to my gaining a few extra pounds, as it will be too easy to make these on a weeknight. :)


First things first: Cream together sugars, butter, egg, and vanilla. Then, stir in flour cocoa powder and chocolate chips (in that order). Let the dough refrigerate for 10 minutes and then...surprise!....that's it! Just bake at 350 degrees for about 10 minutes, and you are in salty double fudge heaven.


Thanks KeepitSimpleFoods (find recipe here) for sharing such an awesome recipe on FoodGawker. Hope you all enjoy testing (and munching) on these; they are a chocoholic's dream <3

Tuesday, June 7, 2011

Cookie Spree Part 1: Madeleines

I am officially obsessed with the site foodgawker.com , which I just found out about the other day when checking out one of my favorite blogs, How Sweet it Is. It is exactly as the name implies, a website where you can gawk at amazing food photography from all over the internet and blogosphere. Click on the photo and you can get redirected to the blog and even the recipe, which is where my thought of Madeleines originated from.

Now tell me, if you saw this photo, would you be able to resist going into the kitchen to whip up some of these beauties? Long story short: I was not strong enough to resist the call, and decided to test out the recipe that corresponds to the photo above from MochiThoughts.

The good news: the recipe is pretty simple and only calls for a few basic ingredients (flour, powdered sugar, butter, vanilla, baking powder and eggs).

The bad news: although not truly bad news, please be aware that greasing the madeleine pan should read "spray the pan until it looks like you've sprayed it too much" as these little cake-like cookies will stick to the pan otherwise. My first batch was ruined (good eating, just not good looking) as I did not want to overly-spray the pan. Turns out there's no such term when it comes to madeleines.

If you can avoid my little mishap, however, there really is no bad news with this recipe. It's simple and effective and makes for good eating. Hope you enjoy!


Vanilla Madeleines (Via MochiThoughts)

2 eggs
1 teaspoon vanilla
1 cup confectioners’ sugar

3/4 cup all-purpose flour
1/4 teaspoon baking powder
1/2 cup butter, melted and cooled

  1. Preheat oven to 375 degrees  Grease and flour (generously) 2 12-cup Madeleine pans
  2. In a medium bowl beat eggs and vanilla with an electric mixer on high speed for 5 minutes. Gradually beat in the powdered sugar and beat for 5 to 7 minutes or until thick and satiny.
  3. Sift together the flour and baking powder. Sift 1/2 of the flour mixture over the egg mixture, gently fold in. Fold in the remaining flour. Then fold in the melted and cooled butter. Spoon batter into the prepared molds, filling 3/4 full.
  4. Bake at 375 degrees for 10 to 12 minutes or until the edges are golden and the top s spring back. Cool in molds on a rack for 1 minute. Loosen cookies with a knife. Invert cookies onto a rack and cool.

Monday, June 6, 2011

Custom Cupcake Website Review - BakedByMelissa

The other day my mom noticed an ad for this new website and so I decided to check it out. Turns out its super cool if you are into the idea of customizing cupcakes. It's called bakedbymelissa.com and she lets you customize your cupcake, from flavor to frosting to filling...what more could you want?

So step 1 (above) is picking what kind of cake you want. Then you move to step 2 (below) where you choose an icing flavor. I went with chocolate/vanilla swirl.

Steps 3 and 4 include optional toppings and fillings, where I chose coconut crunch with a coconut cream filling (yum!).


Unfortunately, here is the negative of this site. The minimum order for custom cupcakes is a whopping 300 cupcakes! At a dollar a piece thats $300 per order. I wish I could try her cupcakes to share with you all how they are, but I am not dropping that kind of cash on cupcakes. Ever. The absolute minimum order (if you really want to test these but don't mind not customizing) is 100 cupcakes at $70. Better, but still a decent lump of cash to spend on mini (yes, they are mini!) cupcakes.

The verdict: If you need cupcakes for a large event, this is most likely a valuable site where you can customize your dessert for your event's needs. But if you are just looking for a sweet fix, I'd opt to just customize the old-fashioned way: DIY.

Friday, June 3, 2011

Funfetti Cupcakes

My brother came home from school yesterday with a request: his creative writing class demanded funfetti cupcakes (if I knew how to make them) for a class party. I happily accepted the task, though I still wondered as to the excitement over funfetti. Even when I was in high school, everyone always wanted funfetti, as if it could not be a party without them. Who am I, then, to stop a party from being had?

I decided I would just use my own vanilla cake recipe and "funfetti-ize" it. Even though funfetti cupcakes typically come in a mix, where's the fun for me if it comes out of a box?

So lately I have only been making small batches of cupcakes since I am testing out new flavors, so making the 2 dozen for his class proved to be almost too much for my little hand mixer. But in the end, it looked pretty enough to eat as is!


So you will see it later in the full recipe at the bottom of the post, but I am going to share with all of you my secret ingredient when it comes to vanilla cupcakes.


Here it is: Vanilla Almond Milk. I swear by this stuff. It has a vanilla flavor that tastes wonderful on its own, and it lends additional flavor to the vanilla extract without coming off as artificial. I also think it helps with the fluffier consistency of the batter, but that's just me. 

In the end, they came out beautiful. The kids wanted chocolate frosting (as opposed to the classic vanilla) which, in my opinion, gives a much better color contrast to the cake. I think, after making these, I have now been turned into a full-fledged funfetti-lover. The smell of vanilla in the kitchen, combined with the rainbow of colors and fluffy moist cake, who could say no to these?


Vanilla "Funfetti" Cupcakes:

1 1/2 cups butter
2 cups sugar
4 eggs
3 cups cake flour
2 tsp vanilla extract
1 cup almond milk
1 tbsp baking powder
1/4 tsp salt
Rainbow Sprinkles

1. Preheat oven to 375 degreed. Place liners in 2 12-cup cupcake pans
2. In a medium bowl, combine cake flour, baking powder, and salt
3. In a large bowl, cream the butter and sugar. Beat in the eggs, two at a time, followed by the vanilla.
4. Alternately fold in the flour mixture and the almond milk, starting and ending with the flour
5. Give batter quick beat with hand mixer at the end to create more uniform consistency (batter will be fluffy and thick).
6. Fold in sprinkles (Use as much or as little as you want!)
7. Bake at 375 for 15-16 minutes or until toothpick comes out clean. Let cool.
8. Frost with your favorite frosting and enjoy!

Welcome to Sugar Mountain!

Hi There!

Well, I have finally made the move from Tumblr to Blogger, and have decided to start documenting my baking adventures here on my wonderful new domain! I am so glad you stopped by.

I will try to keep my personal background brief, since there is a whole page for it in the event that you want to know more. In short I am a twenty year old college student who has loved baking since she owned her first EZ-Bake Oven when she was four. My baking has improved since then (thank goodness!) and although I go to school for English, I plan on opening up my own bakery one day.

Until then, I plan on becoming a food writer, which combines my two loves, food and literature. So watch out Michael Pollan (actually just the chance to meet him would make me ecstatic).

In case you are curious as to the name of my blog, it all started on my twentieth birthday. Each year, my aunt and uncle call me up and sing my "Happy Birthday To You." This birthday was a little different though. After the typical birthday song, my uncle took the phone and sang me the chorus on Neil Young's "Sugar Mountain", which reads 'you can't be twenty, on sugar mountain, though you think you might be leaving there to soon..." Odd birthday song, right? Well, I plan on making sugar mountain my permanent residence, as the bakery has been my lifelong dream and I refuse to give it up, regardless of it's so-called "unsound" nature.

So if I have not bored you with my little intro, I want to welcome you to the Mountain and I hope you visit often for neat recipes and baking experiments, as well as any other sugar-laden fun!